How to Install Flap Barriers the Right Way

Installing flap barriers isn’t just about putting metal into the ground. It’s about laying the foundation for an access control system that works reliably, every time. Unfortunately, many installations go wrong not because the product is faulty, but because of rushed or careless setup. Small errors lead to big problems—flaps that jam, sensors that misfire, or systems that just don’t work as expected.
That’s why this guide exists. It’s for facility managers, project leads, and security installers who want every step to be done right the first time. Whether you’re new to flap barrier setup or looking to sharpen your process, this guide offers a clear, practical path. No jargon. No fluff. Just real, field-tested steps to follow.
You’ll learn the key principles behind successful installations—starting with the ground you build on, through to the wiring, mounting, configuration, safety checks, and final testing. Each step matters, and skipping even one can cost you hours in rework.
Follow these instructions closely, and your flap barrier system won’t just work—it’ll run smoothly for years. Let’s begin where every great project starts: with proper site preparation.
Step 1 – Site Preparation for Success
Flap barrier setup starts with the site itself. This step sets the tone for everything that follows. If the foundation isn’t right, no amount of wiring or software can fix it. The first step is checking the surface where the barrier will be installed. It needs to be clean, dry, and level. If the floor is uneven, the barrier won’t align properly, and that leads to flap jamming and misread sensors.
Measure the installation area. Make sure you have enough space for the full flap movement, plus clearance for foot traffic. There should be no tight corners or walls that interfere with users entering and exiting. Once you’ve confirmed space, mark out the positions where the units will be fixed. This includes anchor points, conduit paths, and any wall brackets.
Check your power supply. Make sure the voltage matches the product specs, and that you have a clean line with no load-sharing that could cause voltage drops. Look for any water leaks, loose tiles, or obstacles in the path of installation. A flawless barrier install needs a flawless surface.
Following a solid installation tips checklist ensures you don’t miss critical steps like these. The better the prep, the smoother the install. Rushing this stage usually leads to more work later, so slow down and do it right.
Step 2 – Wiring Best Practices
Wiring is the nervous system of your access control installation. It must be clean, safe, and carefully routed. This step starts with inspecting all cables for damage or wear. Never use cables that are frayed or pinched, even slightly. Use wiring conduits to keep power and signal lines separated. This prevents interference and keeps the system reliable.
Your flap barrier may include power wires, control signal wires, and network lines. These must be labeled clearly from both ends. Unlabeled wires are a major cause of confusion during testing and maintenance. Use industry color codes when possible. Label every cable before you run it.
Grounding matters. A flap barrier that isn’t properly grounded can behave unpredictably. It may suffer from surge damage, motor glitches, or erratic sensor behavior. Use a dedicated ground line, and test the continuity before powering up.
Include surge protection on your main power line. Fluctuations from nearby HVAC units or elevators can cause system reboots or damage. A stable current gives your control boards the clean power they need to operate.
These steps sound simple, but they are often skipped. And when they are, the entire system becomes unstable. Review your wiring plans, compare them with the manufacturer’s diagrams, and take the time to follow error avoidance methods. Great wiring leads to great performance.
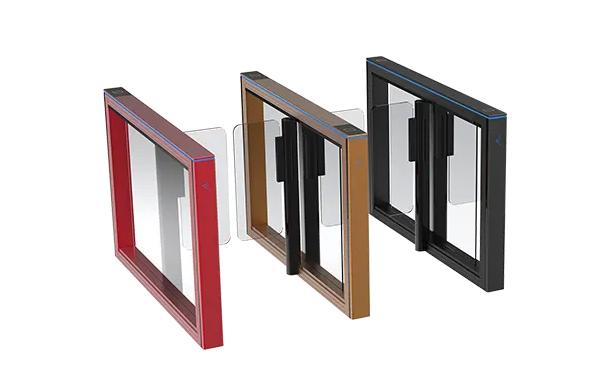
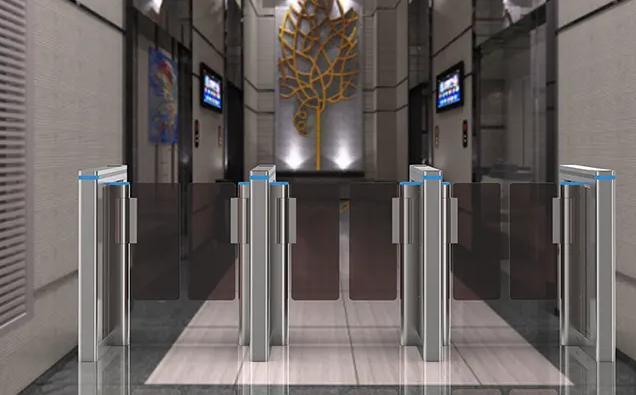
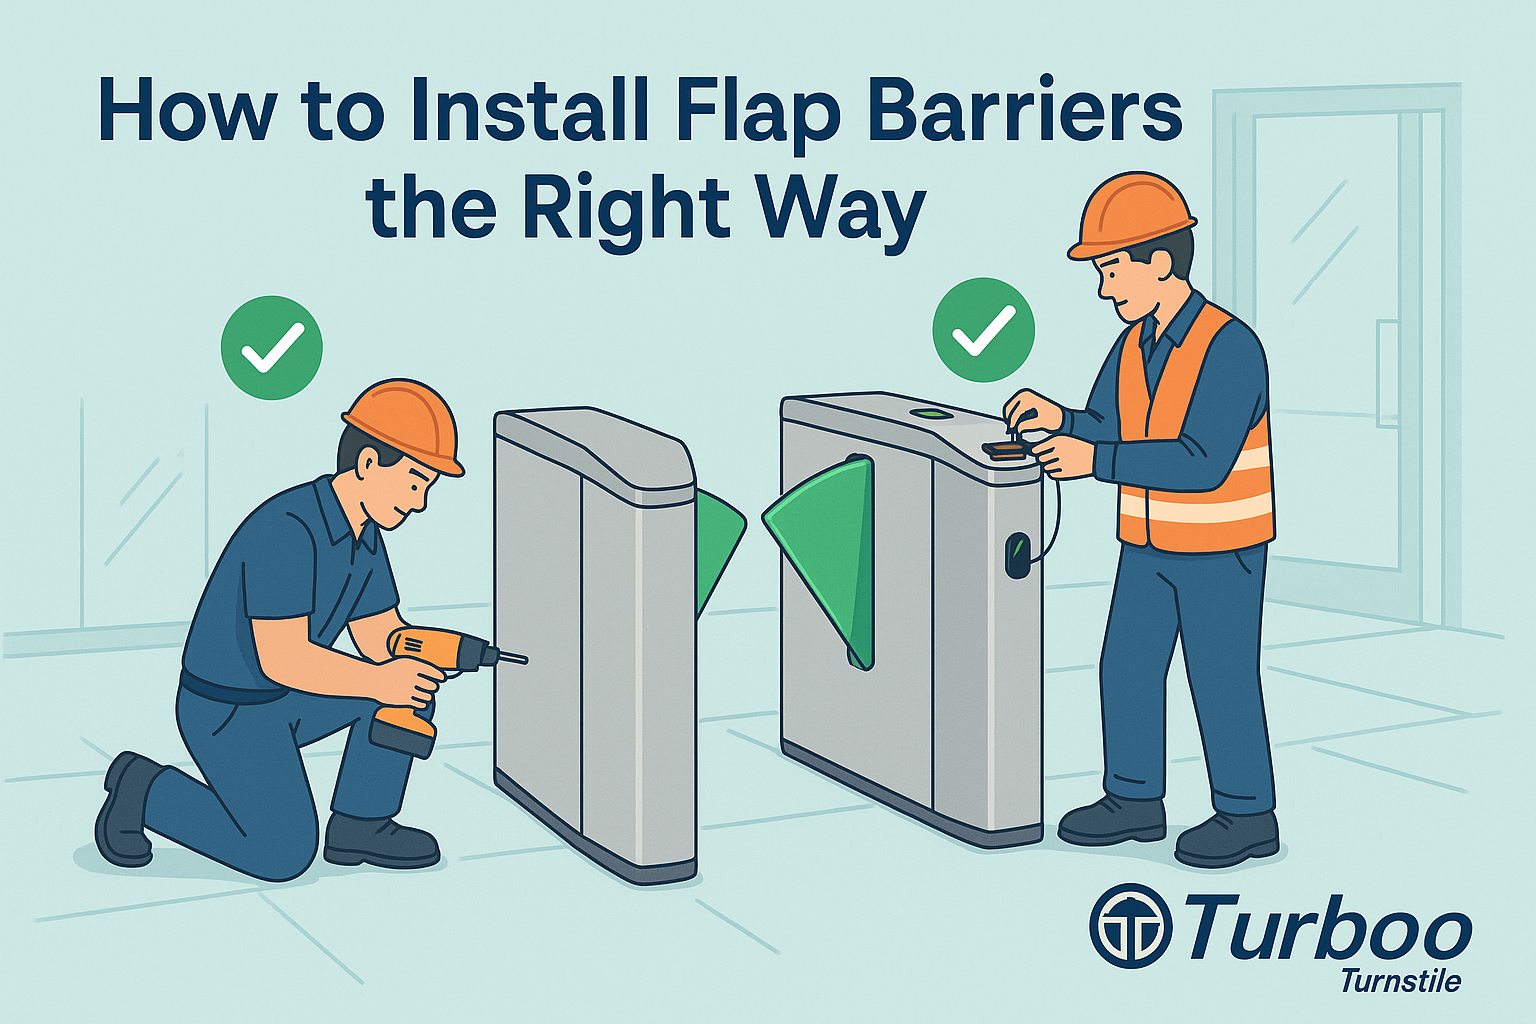
Step 3 – Secure Mounting and Frame Positioning
A flap barrier isn’t just an electronic device—it’s a mechanical structure. That means it must be mounted securely to avoid vibration, shifting, or future misalignment. Start by drilling anchor points based on your site markings. Use the hardware included with the product, or bolts rated to handle the weight and vibration level expected.
Every anchor must be fully tightened. Loose bolts lead to instability, especially in high-traffic areas. Check for frame squareness. If the unit isn’t exactly square, the flaps won’t open evenly, and that causes stress on the hinges or motors.
Spacing between barriers is another key issue. If you’re installing two or more units side-by-side, make sure there’s consistent distance between them. Uneven spacing affects the alignment of user paths and can create bottlenecks or entry delays.
Use a spirit level to check for tilt in all directions. Even a few degrees of angle can cause the flaps to scrape or hesitate. Once mounted, the barrier should feel solid—no movement, no shake, and perfectly flush with the floor.
Mounting isn’t the most exciting part of the job, but it’s one of the most important. Take your time and check your work twice. A poorly anchored barrier can’t be fixed with software. It will need to be remounted, and that means drilling again.
Step 4 – Calibration for Smooth Operation
Calibration is where your flap barrier comes to life. This step tells the motors how far to open the flaps, how fast to move them, and how to respond to user actions. If you skip calibration, or rush through it, the barrier will feel clunky or unresponsive.
Start by accessing the barrier’s setup interface. This might be a software program, touchscreen panel, or dial-based control panel depending on the model. Follow the prompts to set flap opening angles, speed, and delay times. The goal is smooth, quiet motion that responds naturally to users walking through.
Next, calibrate the sensors. These detect people approaching, check for tailgating, and trigger flap actions. Sensors must be aimed properly and synced with the flap movement. If they’re out of sync, the barrier may open late or not at all.
Use configuration software provided by the manufacturer or referenced in your installation guide. These tools allow you to fine-tune detection zones and trigger thresholds. Take the time to test and adjust multiple times until everything feels right.
Calibration is often rushed, especially near the end of the day. But it’s one of the most visible signs of a quality installation. A properly calibrated barrier moves like it belongs—clean, confident, and silent.
Step 5 – Safety Checks and Industry Standards
Flap barriers are powerful machines with moving parts, electricity, and user interaction. That’s why safety checks are mandatory—not optional. Every unit must comply with established access control installation safety protocols. Ignoring this not only puts users at risk but can result in fines or lawsuits if something goes wrong.
Begin by confirming that the flap barrier includes an emergency release or override mechanism. In a power outage or emergency event, users must be able to exit freely. This function should be tested several times to ensure consistent performance.
Next, check the sensor sensitivity. If the flaps close too quickly or don’t recognize a user in time, injury is possible. Set timeouts generously, and use soft-close or auto-reverse features to protect users walking at slower speeds or carrying large bags.
Verify the presence and visibility of safety labels. These inform users where to stand, how to approach, and what actions are safe. In public installations, such markings are required by law in many regions.
You should also cross-reference your setup with the relevant industry standards. Resources from the Security Industry Association provide guidelines on barrier spacing, emergency access, sensor thresholds, and more. These aren’t just best practices—they’re legal expectations in many jurisdictions.
After the safety check, inspect your wiring one last time. Make sure grounding is secure, there are no exposed wires, and that all fuses or circuit breakers are rated correctly. Run a complete cycle through the system and watch for any hesitation or irregular motion.
Safety checks should never be rushed. This stage is where your installation is judged most harshly by end-users and inspectors. When done well, it proves your commitment to performance and protection.
Step 6 – Testing Before Handover
Once all installation steps are complete, your last task is testing—and this step is critical. A full test run ensures every part of the flap barrier setup performs correctly. Without this, issues may only show up after the project is signed off, leading to embarrassing callbacks.
Start with power-up. Confirm that the system boots without error codes. Then test access credentials—RFID cards, keypads, biometrics—whatever the system is designed to accept. Each input should trigger a consistent, timely flap response.
Next, test multiple user types. Try fast and slow walkers. Try someone pausing mid-barrier. Make sure the sensors and flaps respond with no hesitation or misfires. This is where real-life movement patterns matter.
Tailgating prevention is another key test. Walk closely behind a valid user with no credential. The system should detect and react appropriately, either by alarm or by not opening for the second person. These are functional security tests that must pass before the handover.
Finally, run endurance cycles. Open and close the flaps repeatedly—ideally 50–100 times—to confirm mechanical stability and flap return accuracy. Listen for odd sounds, pauses, or forceful contact. These signs can indicate hidden issues like motor strain or alignment trouble.
Your test cycle is the last chance to catch issues before the client does. This is your moment to prove the system works. Complete your internal checklist and make any adjustments now—not after handoff. When you hand over a tested, verified system, clients feel the difference immediately.
Common Mistakes to Watch For
Even the best teams can slip up if they’re not careful. Many flap barrier installations go wrong for reasons that are entirely preventable. One of the most common mistakes is failing to level the floor before mounting the unit. Even slight tilts cause long-term damage, including misaligned flaps and extra strain on motors.
Another frequent error is poor wiring—either by using unshielded cables, skipping surge protection, or mislabeling wires. This leads to system crashes, access issues, or even electrical hazards. These mistakes aren’t visible at first but cause big problems over time.
Rushing calibration is another red flag. When teams skip testing flap speeds or don’t fine-tune sensors, the gate becomes a user annoyance instead of a seamless solution. Clients then complain about delays, sensor failures, or even accidental flap contact.
Skipping safety checks is more than an oversight—it’s a liability. Systems that don’t meet access control installation safety guidelines might work on the surface but fail during emergencies, exposing your team to legal trouble and reputational harm.
You can avoid these mistakes by staying consistent with your planning. Use tools like the official flap barrier checklist to stay on track. Smart teams build routines that catch problems before they happen and review their work at each stage.
In short, mistakes happen most when teams assume things will “just work.” Don’t assume. Check. Test. Confirm. That’s how professionals ensure success.
Preparing for Future Maintenance
A professional installation doesn’t end when the barrier starts working. It includes preparing for the months and years that follow. That’s where thoughtful planning for maintenance comes in. Your job isn’t just to install—it’s to set up the system for easy service later.
Start by labeling all wires and documenting every connection. Include wire tags, terminal numbers, and port assignments. Create a small diagram of your layout and leave it with the client or facility team. These steps make it much easier to troubleshoot if the system ever malfunctions.
Make sure that flap access panels are easily reachable. Don’t block them with fixtures, cabinets, or other installations. You’ll need to get into those areas for sensor adjustments, software updates, or motor replacements.
Store software licenses and firmware backup files in a central, secure location. Some systems need specific versions to operate correctly. If the client loses this data, future upgrades become complicated or impossible.
Finally, teach the maintenance team how to clean the units and check for visible wear. Dust, grit, and vibrations from heavy use can affect moving parts. Preventive care is simple but crucial for long-lasting performance.
When you build for the future, clients notice. They feel taken care of, and they’ll come back to you the next time they need access control installation done right.
Syncing with Access Control Systems
Flap barriers don’t operate in isolation. They connect to a broader access control system—one that might include card readers, fingerprint scanners, face recognition, or cloud-based access management software. Installing flap barriers the right way means syncing them perfectly with these components.
Start by confirming communication protocols. Is the system using Wiegand, RS485, or TCP/IP? Flap barrier controllers must match the output type of the access readers. Mismatched protocols mean your gate won’t recognize signals—or worse, will misinterpret them.
Next, test real-time communication. Swipe a card and watch the flap’s reaction. There should be no lag, misread, or multiple openings. Integrate the alarm system if required. For example, a failed access attempt should trigger a local alert or a security team notification.
Work closely with the client’s IT team to confirm network paths, security firewalls, and any static IP assignments. Even if everything is wired perfectly, blocked network ports or firewalls can stop data flow between devices.
Take time to confirm log generation and data tracking. Does the system record every passage, block, or tailgate attempt? If not, you may need to reconfigure access software or storage settings.
Flap barrier setup doesn’t end with physical installation. The real test is whether it plays well with the rest of the security system. When it does, your install becomes a seamless part of the facility’s daily operation.
Training On-Site Users
Once the system is up and running, it’s easy to assume your job is done. But if the users don’t understand how to use the flap barrier correctly, the whole setup can fail—not mechanically, but operationally. That’s why user training is the final layer of a successful flap barrier setup.
Start with a basic walkthrough. Show staff how to approach the barrier, how to present access credentials, and what to do if the flap doesn’t open. Demonstrate the timing of the flaps—how quickly they close, when they lock, and how they respond to tailgating.
If the system includes multiple authentication methods—like cards and biometrics—demonstrate each one clearly. Avoid technical terms. Keep it simple and visual. People remember what they see more than what they hear.
Train users on emergency protocols too. Where are the emergency release buttons? What happens during a fire drill? Make sure this knowledge is passed to everyone who works near or uses the barrier.
Provide written guides or short training videos if possible. That way, new employees or shift changes won’t leave gaps in knowledge. When users understand how the system works, they’re less likely to make mistakes or trigger false alarms.
Good training minimizes user frustration. It also reduces support calls, freeing your team to focus on other projects. And most importantly, it ensures that the flap barrier system delivers not just security—but also smooth, stress-free daily use.
Documenting the Installation Process
Documentation isn’t just paperwork—it’s your backup plan. It’s the proof of a job done right and a reference point for any future troubleshooting. Proper documentation adds value, protects your team, and enhances client satisfaction.
Start with photos. Take clear shots at each stage—site prep, wiring layout, mounting, calibration, and final tests. These serve as a visual log of your work and help confirm that each step was followed correctly.
Keep diagrams of wiring connections and system architecture. Label each component’s location, especially if the site has multiple barriers or devices. Note software versions, IP addresses, and configuration settings.
Store all this data in both printed and digital formats. Send a copy to the client and keep a backup for your own records. Include your contact information, warranty terms, and recommended maintenance schedule.
When clients see that level of detail, they know you’re serious. And if they ever need support or a system expansion, your documentation gives them the clarity to move forward with confidence.
Final Walkthrough with Clients
Before handing over the project, do one last walkthrough with the client. Show them the full operation of the flap barrier system. Demonstrate how users enter, how the flaps respond, and what happens when there’s an invalid attempt.
Confirm that every feature they requested is present and working. If they asked for integration with access logs or building alarms, test those features together. This is your opportunity to prove the value of the system you’ve installed.
Answer questions clearly. Review the documentation you’ve prepared. Walk them through the emergency procedures and user interface. Don’t assume they know what to do—show them step by step.
A good final walkthrough leaves clients satisfied and confident. It also gives you a chance to reinforce your professionalism and set expectations for future support or upgrades.
Tools and Materials Review
Every successful installation begins with the right tools. Before leaving for the job, review your equipment. This includes drills, anchors, screwdrivers, voltage testers, crimping tools, laptops for calibration, network cables, and safety gear.
Bring extras of common items like screws, wire connectors, and fuses. Unexpected changes happen. A few spare parts can save a lot of time.
Check that your software is up to date. Some flap barriers need firmware updates or licensing before they work. Having your tools and materials ready makes the difference between a smooth job and one filled with delays.
Workflow Planning and Scheduling
Finally, take a moment to plan your workflow. Map out the steps of your installation—site prep, mounting, wiring, calibration, testing, and handover. Assign tasks to each crew member before you begin.
Schedule your time realistically. Don’t overbook your team. Allow room for testing, client walkthroughs, and adjustments. A well-paced install is almost always a better-quality install.
When your workflow is smooth, your team works better, and your client feels the difference. Planning ahead ensures that you install flap barriers the right way—not just quickly, but confidently.
Conclusion – Confidence in Every Installation
Installing flap barriers the right way is more than just following instructions. It’s about taking ownership of the process—from planning to power-up. When you treat each step with care—preparation, wiring, calibration, testing—you create systems that last and clients who trust your work.
This guide has shown you the full picture. Now, it’s time to apply it. Every barrier you install is a chance to prove your skill and build your reputation. Stick to the process. Avoid shortcuts. And deliver results that speak for themselves.
You’ve got the knowledge. Now go install with confidence.
FAQs
Q1: What’s the most critical step in flap barrier installation?
Site preparation. Everything else depends on a level surface and clear layout.
Q2: Can I skip calibration if the unit powers on?
No. Calibration ensures sensors and flaps are timed correctly. Skipping it affects user flow.
Q3: How do I avoid signal problems with access control?
Use shielded cables, label wires, and match protocols (Wiegand, RS485, TCP/IP) exactly.
Q4: What’s the best way to test before handover?
Run multiple scenarios: fast entry, slow entry, tailgating, and emergency release. Repeat several times.
Q5: Should I train users after installation?
Yes. Even a perfect system fails if users don’t know how to use it correctly.