Avoid These Flap Barrier Installation Mistakes

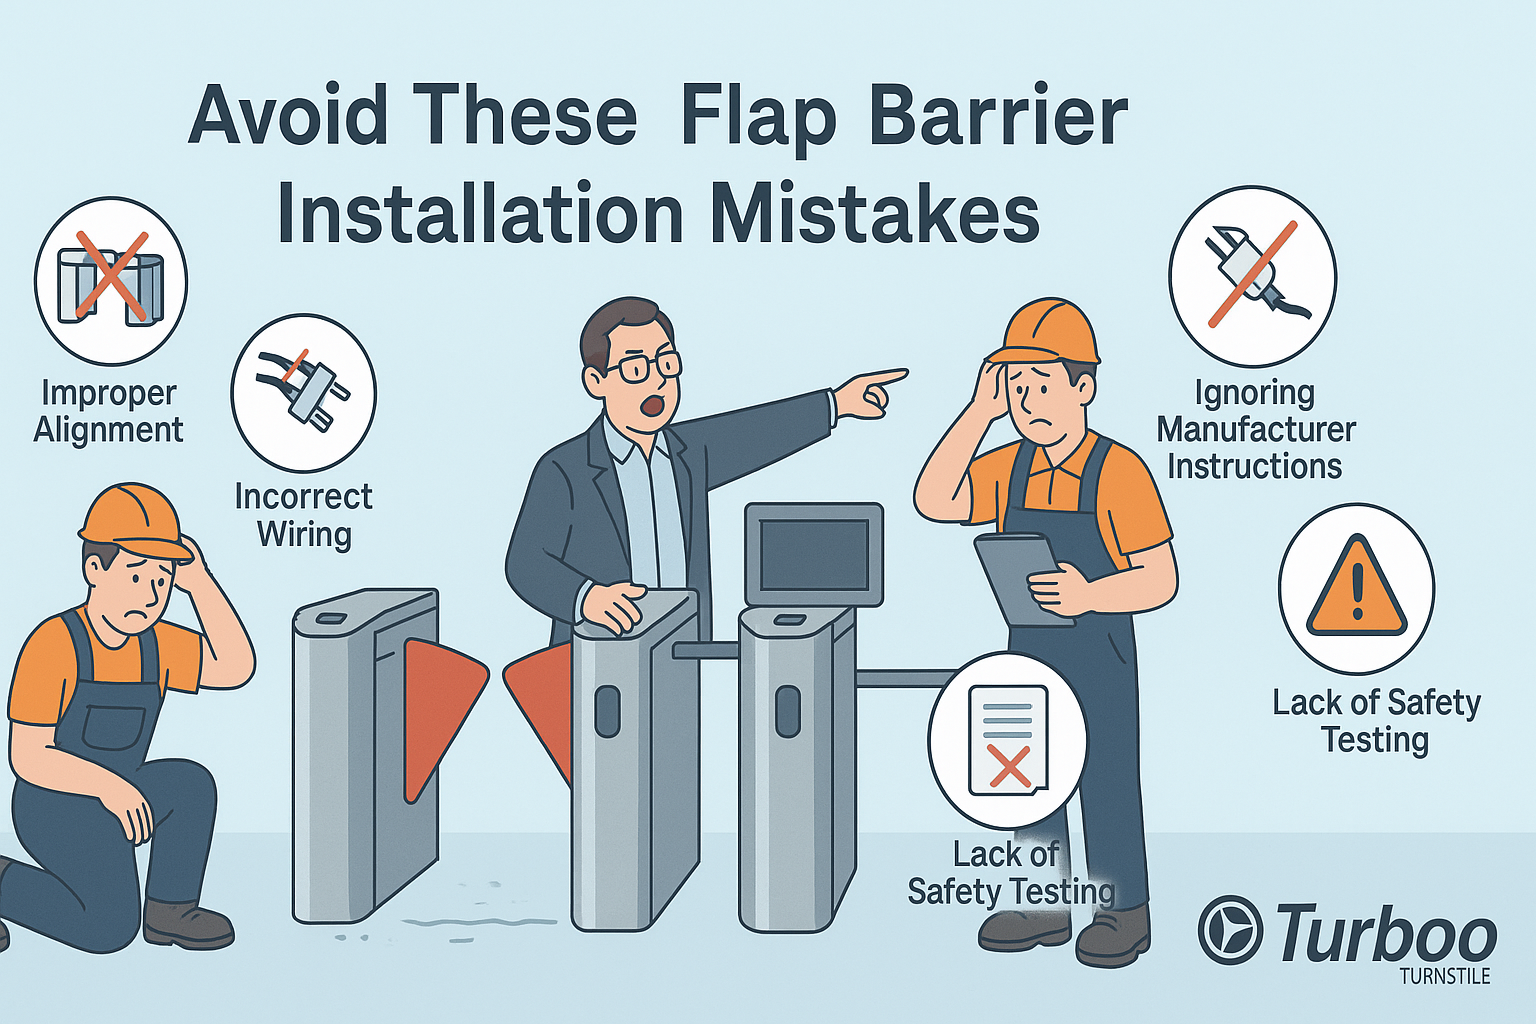
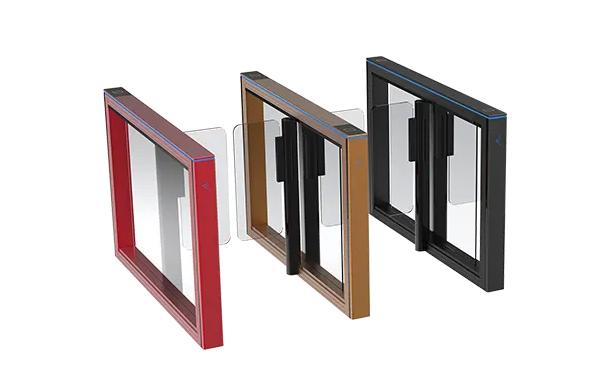
Flap barriers play a critical role in modern access control systems, offering a balance of security and convenience in high-traffic areas. But here’s the catch—installing them isn’t as straightforward as it seems. The margin for error is razor-thin, and even minor mistakes can cause major issues down the line. From security breaches to mechanical breakdowns, poor installation practices can turn a smart solution into a costly problem. Whether you’re a security contractor, a facility manager, or an installation technician, avoiding these pitfalls is non-negotiable.
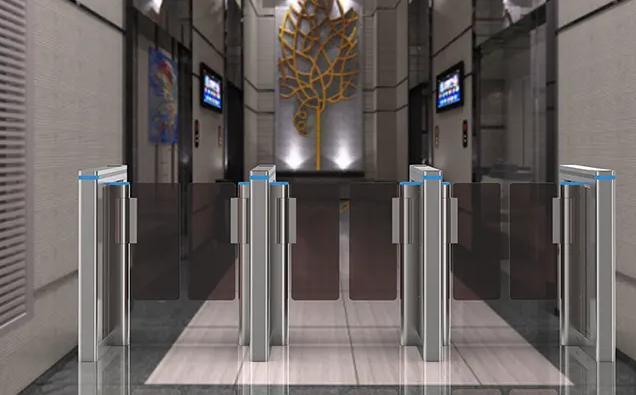
Imagine a new facility opening its doors with sleek, high-end flap gates. Everything looks perfect—until users notice delays, the flaps jam, or the barrier refuses to respond. These aren’t product failures. They’re the direct result of common flap barrier installation errors. This guide was created to help you avoid exactly those kinds of headaches.
We’re diving deep into the most frequent installation mistakes—site prep issues, alignment flaws, wiring missteps, calibration neglect, safety oversights, and test failures. These aren’t theoretical problems; they’re the real-world causes behind most barrier setup issues. And the best part? Every single one of these mistakes is preventable.
By the end of this article, you’ll gain practical insight and proven techniques to help you perform error-free installations every time. Think of this as your installation playbook, designed to boost your confidence and protect your reputation. Let’s begin by looking at the first mistake—poor site preparation.
Mistake #1 – Poor Site Preparation
Flap barrier installation doesn’t begin when the unit is unboxed. It starts well before that—with the site itself. This is where many projects go wrong right out of the gate. Poor site preparation is one of the most common installation mistakes, and unfortunately, its effects aren’t immediately visible. They sneak up over time, turning what seemed like a solid install into a nightmare.
So, what exactly counts as poor preparation? Uneven flooring, improper power access, lack of space for service access, and missing foundational reinforcements are just a few examples. When the surface isn’t level, the flap gate’s frame won’t sit flush. That causes a misalignment in the flaps, which leads to unnatural pressure on motors and sensors. Over weeks or months, this results in jerky movement, flap jamming, or complete system failure.
Worse still, trying to “make it work” by adjusting the unit instead of fixing the site only masks the problem temporarily. A clean, precise, and level surface is essential for long-term performance. Proper cable routing, correct conduit depth, and accurate measurements must all be confirmed before the unit is installed.
Security contractors and installation teams should consult a professional site prep checklist before laying a single wire or bolt. Prepping the environment for the flap barrier may feel like extra work upfront, but it saves you hours of rework and prevents client dissatisfaction later. Remember: a stable barrier starts with a stable foundation.
Mistake #2 – Incorrect Barrier Alignment
Even the most advanced flap gate system can’t function properly if it’s not aligned correctly. Alignment may seem like a small detail—after all, how far off could it really be? But when you’re dealing with precision-based mechanics and real-time access verification, a few millimeters can cause major disruptions.
Incorrect barrier alignment throws off the gate’s motion, triggering sensor misreads, sluggish flap responses, and premature wear on internal components. If one side opens slightly before the other or if the flaps don’t retract cleanly, it’s usually an alignment issue. Users may experience delays, or worse, be physically blocked or nudged by a misaligned flap.
These barrier setup issues not only frustrate users but can also damage the trust in your access control system. If employees or visitors can’t rely on smooth entry, the security barrier becomes a bottleneck instead of a benefit.
To prevent this, installation teams must use laser levels, ensure exact centering of the units, and verify that the flaps move without resistance. Every part of the gate must be square with both the floor and each adjacent component. Even a slight tilt creates a ripple effect that can disturb the entire system.
The irony is that alignment errors often occur in rushed installations. Don’t let a tight schedule compromise quality. A few extra minutes spent aligning your flap gates properly can save hours of troubleshooting and customer complaints later.
Mistake #3 – Faulty Wiring Practices
Wiring is the nervous system of any flap barrier. One wrong connection, loose terminal, or skipped grounding step, and your entire setup can malfunction. Yet faulty wiring remains one of the most frequent flap barrier installation errors today. It’s a silent issue that often doesn’t show up until after the system has been handed over to the client.
One common mistake is inconsistent power supply configuration. If voltage isn’t steady, the gate may perform erratically or shut down altogether. Poor grounding can expose the system to power surges, damaging sensitive control boards. Loose connectors and incorrect cable routing cause signal loss or delays between sensors and motors, degrading the user experience.
And then there’s the infamous practice of using “similar looking” wires without proper labeling. This can confuse even seasoned technicians during maintenance and makes diagnostics a nightmare. Imagine trying to resolve a barrier issue under time pressure, only to discover a tangled mess of undocumented wiring. It’s avoidable, but only with proper planning.
Standardized practices, thorough labeling, and double-checking every circuit go a long way in preventing wiring-based barrier setup issues. Make sure your team has access to updated wiring schematics and the correct tools to test every connection. Electrical setup isn’t the place to cut corners—flap gate errors here can lead to complete system failure, not to mention fire risks.
Before moving to the next unit, each installation must undergo a power check, signal test, and surge protection validation. Faulty wiring might not seem like a problem on day one, but it’s often the reason installations fail by day thirty.
Mistake #4 – Skipping Calibration Steps
Once the flap barrier is physically installed and powered on, it’s tempting to think the job is done. But skipping the calibration process is one of the most overlooked and damaging flap barrier installation mistakes. Calibration ensures that every sensor, motor, and flap arm is tuned correctly to operate as expected. Without this step, even the best-looking install will underperform.
Let’s break it down. Calibration aligns the internal sensors with the external movement of the flaps. It tells the barrier when to open, how far to move, and how to respond to different scenarios—such as tailgating or unauthorized access attempts. When skipped, the flap gates either over-respond, under-respond, or completely misinterpret valid access attempts.
In many real-world installations, technicians forget to configure flap opening times, delay settings, or detection zones. The result? Flaps that open too quickly, slam shut before a person passes, or freeze in the middle of operation. Calibration is not just about comfort—it’s about ensuring the barrier integrates smoothly with your building’s access control system.
More importantly, every model has different calibration needs. You can’t use a one-size-fits-all approach. Modern barriers come with built-in configuration menus or software interfaces, and skipping these steps leaves your system unprotected and unreliable.
Poor calibration also leads to early component degradation. When motors strain to correct misread positions, they wear out faster. Sensors constantly compensating for misalignment drain power and fail earlier. Think of calibration as the “final tuning” that aligns all the working parts into one smooth, secure motion.
A successful flap barrier installation must always include detailed calibration as outlined in the product’s install guide. Otherwise, you’re simply gambling on your system’s reliability.
Mistake #5 – Ignoring Safety Standards
In the rush to complete a project, safety standards often get pushed aside. But this is more than just a mistake—it’s a liability. Ignoring safety guidelines during flap gate installations creates risk for users and opens up contractors and facility managers to serious legal consequences. The truth is, flap gates are powerful machines. Without proper safeguards, they can injure, trap, or intimidate users.
Common safety oversights include failing to install emergency stop buttons, not verifying auto-reverse mechanisms, or using inappropriate materials that don’t meet fire resistance or impact ratings. These aren’t minor misses—they directly impact user safety. In high-traffic areas, even a momentary flap gate error can cause injury or panic, especially if children or elderly individuals are present.
One frequent error is bypassing sensor validation. Sensors are responsible for detecting a person’s presence and movement. If they’re not installed correctly or tested thoroughly, they can misread actions—causing the flap to close on someone mid-passage. That’s not just frustrating. It’s dangerous.
Safety standards are in place for a reason. Regulatory bodies require specific clearance distances, signage, alert mechanisms, and accessibility features. Ignoring these leads to compliance violations that could shut down your entire access control system.
Make sure to cross-reference safety benchmarks from industry authorities like IFSEC Global during planning and implementation. These resources help ensure you’re not just checking boxes—you’re protecting people.
In today’s environment, where user experience is tied directly to brand trust, safety isn’t optional. It’s the foundation on which every secure, smooth-flowing installation rests.
Mistake #6 – Failing to Conduct Final Testing
You’ve installed the flap barrier. It’s wired, aligned, and even calibrated. So what’s left? Final testing. And skipping this last step is a surprisingly common flap barrier installation error. It’s the equivalent of building a car and never starting the engine to see if it runs. Without final testing, you have no proof the system works the way it should.
Final testing is your only chance to catch small issues before they become operational disasters. A sensor might not respond consistently. A flap may hesitate on certain commands. Maybe the integration with the access control system hiccups every few swipes. These things don’t reveal themselves until the system is run under normal operating conditions.
The most frequent oversight here is rushing to hand over the system without putting it through a simulated daily usage cycle. A real test involves observing the flap barrier across multiple entries and exits, verifying every reaction, and validating both security protocols and user flow. That includes checking emergency response features, multi-user entries, and tailgating prevention systems.
Without this comprehensive test, any underlying setup issue remains buried—until the first wave of users exposes it. And by then, your team may be gone, and your client frustrated.
One best practice is to run the system for several hours in a test mode, logging any unexpected behaviors and making real-time corrections. Not only does this fine-tune performance, but it also builds your client’s confidence. They see firsthand that their investment is working as promised.
This isn’t just about catching mistakes; it’s about delivering a final product that performs smoothly on day one and every day after. When you test properly, you’re not just finishing the job—you’re proving it’s done right.
Understanding Barrier Setup Issues Holistically
It’s tempting to view each flap barrier installation error in isolation, but they’re often connected. Poor site preparation causes misalignment. Misalignment stresses the motors, leading to calibration difficulties. Faulty wiring confuses signal paths, which undermines safety mechanisms. And when safety protocols are ignored, final testing becomes ineffective—or worse, misleading.
Barrier setup issues often compound. One overlooked step leads to a chain reaction that weakens the entire system. That’s why a holistic view of the flap gate installation process is crucial. Each component—physical, electrical, and digital—depends on the others to function correctly.
Professional installation isn’t just about assembling hardware. It’s about orchestrating a system where every part supports the other. You must think like an engineer, electrician, safety officer, and end-user—all at once.
Recognizing this helps avoid what many professionals refer to as “ghost errors”—those strange glitches that only appear after everything seems to be working fine. These phantom issues almost always trace back to a foundational mistake, like improper grounding or skipped calibration.
That’s why this guide doesn’t just highlight individual mistakes. It shows how flap barrier installation errors are part of a bigger picture. Only by stepping back and viewing the system as a whole can you install it in a way that’s both secure and sustainable.
By adopting a holistic mindset, installation teams can create systems that not only meet technical requirements but also earn long-term trust from clients. And in today’s competitive security environment, that trust is everything.
How to Approach Flap Gate Installation Correctly
Avoiding installation mistakes starts with a smarter approach—not just better tools. Successful teams don’t wait for problems to appear. They follow a structured plan from the moment the project begins. That means starting with a full site survey, documenting floor layouts, verifying power sources, and coordinating closely with the client’s IT and facility teams.
Every technician should know the layout and plan before arriving on-site. This isn’t about being rigid—it’s about reducing guesswork. When every team member is aligned, there’s less room for costly errors and miscommunication.
Documentation plays a key role here. Photos, measurements, and wiring diagrams should be created and saved throughout the process. These records not only help during setup but also serve as essential references for future maintenance or upgrades.
Another smart move? Creating a pre-install checklist and post-install report. These don’t just ensure quality—they’re proof of professionalism. Use guidance like the one found in this installation tips resource to standardize your approach.
Finally, invest in training. Tools and tech evolve constantly, but skilled installers stay sharp through ongoing learning. Teams that understand not just how to install a flap barrier but why each step matters make fewer mistakes and deliver better results.
With a clear, structured method in place, flap gate errors can be reduced to near zero. That’s not a marketing promise—it’s the result of consistent, disciplined installation practices.
Benefits of Following a Reliable Install Guide
No matter how experienced your team is, every flap barrier installation benefits from a clear and reliable guide. Skipping structured instructions might save time in the short run, but it almost always results in rework. Even small setup differences between models can cause big issues when ignored.
A good install guide outlines every essential step—from physical anchoring and electrical setup to software configuration and calibration. It gives clear direction for connecting control boards, testing access systems, adjusting flap speeds, and verifying safety features. This isn’t just helpful—it’s a safeguard against assumptions that often lead to flap gate errors.
Think of the install guide as a GPS for your barrier setup. Without it, you may still reach your destination—but you’ll take the long, bumpy route, missing key checkpoints along the way.
Following a vetted install guide helps avoid misalignment, wiring mistakes, and overlooked safety mechanisms. It also ensures compatibility with other systems like biometric scanners or RFID readers.
Many installation teams rely on prior experience, but when the model or environment changes, that experience may not translate well. Guides help bridge the gap between theory and practice. They account for product updates, site-specific variables, and manufacturer-recommended calibration techniques.
There’s also a confidence factor. Clients feel reassured when they see the team using structured documentation. It tells them the install is being done properly, not improvised on the spot. This enhances your reputation and helps build long-term relationships.
Using a reliable guide isn’t a sign of inexperience—it’s a mark of professionalism. It reflects your commitment to quality, accuracy, and safety. And when you’re dealing with high-value security infrastructure, that commitment is everything.
Case Study – A Costly Flap Barrier Error
Consider this real-world scenario: a corporate office invested in high-end flap barriers to secure their employee entrance. The vendor promised a seamless experience, but just days after installation, problems emerged. The gates randomly locked during use, sensors failed to detect users properly, and complaints piled up from frustrated employees.
What went wrong? A post-incident review revealed a cascade of setup errors. First, the floor wasn’t leveled before installation, creating subtle misalignments. Then, the access control wiring was loosely connected, causing intermittent communication failures. Most critical of all, calibration was rushed. The barriers weren’t synced properly, which led to jerky movements and safety malfunctions.
The facility had to shut down the gates for two weeks. The vendor sent back the installation team to redo the job—this time with full documentation, strict testing, and proper calibration. The cost of repairs, downtime, and lost confidence was substantial.
This case isn’t unique. It mirrors what happens when installation teams ignore the interconnected nature of flap barrier systems. Every stage—site prep, wiring, alignment, and calibration—affects the others. A single oversight can unravel the entire setup.
But there’s a positive takeaway. After fixing the errors and using a proper install process, the new system worked flawlessly. Employee complaints vanished, and the client praised the responsive support. The experience proved that even when things go wrong, a return to best practices can restore performance and rebuild trust.
Let this example serve as a powerful reminder: doing it right the first time saves more than money—it protects your reputation.
Comparing Best Practices vs. Common Mistakes
Understanding the difference between best practices and typical mistakes can be the turning point in your installation process. Best practices aren’t just good habits—they’re field-tested methods proven to minimize errors and maximize efficiency. Common mistakes, on the other hand, usually stem from haste, overconfidence, or a lack of planning.
Best practices include structured site evaluation, exact alignment, clear documentation, proper wiring protocols, software-based calibration, and multi-phase testing. These approaches ensure smooth barrier operation, lower maintenance costs, and safer usage.
On the flip side, frequent flap barrier installation errors such as uneven placement, ignoring safety compliance, or skipping final tests all stem from poor preparation or improper training. They create long-term reliability problems and increase the chances of user injury or system failure.
Resources from industry leaders like IFSEC Global offer in-depth insights into emerging security tech, regulatory updates, and expert-approved installation techniques. These guides help bridge the gap between manufacturers’ intent and installers’ practices.
Contractors who regularly study such resources and train their teams accordingly tend to outperform competitors in both quality and customer satisfaction. Their projects are smoother, quicker, and more likely to result in referrals and repeat business.
So ask yourself: do you want your installs to be examples of what to avoid or what to follow? By committing to best practices and avoiding known setup issues, you ensure your projects stand out for the right reasons.
Resources to Learn From Common Errors
The best way to avoid mistakes is to learn from them—especially when others have already made them. Fortunately, the access control industry is filled with resources that document real-life flap gate errors and how they were resolved. These case studies, professional forums, and technical breakdowns provide valuable lessons that can transform how you approach installations.
One of the most insightful resources is Security Info Watch, which frequently covers installation errors across a range of security systems. Their articles highlight recurring issues—like skipping testing, poor wiring routes, or uncalibrated sensors—and provide expert commentary on what should have been done differently.
When technicians and teams read about these failures, they gain something critical: perspective. You realize how a small misstep—like not labeling a wire or failing to read a floor plan—can spiral into hours of downtime and angry client emails.
More importantly, these resources help build a problem-solving mindset. Instead of reacting to issues, you start anticipating them. You recognize red flags during the planning phase, ask the right questions during site visits, and double-check configurations before handing off the project.
Professional networks also provide firsthand insights. Installation technicians often share photos, solutions, and suggestions on industry forums or in closed groups. Participating in these discussions keeps your team current and prepared for real-world challenges that don’t always appear in manuals.
So don’t underestimate the power of continuing education. Reading up on common errors isn’t just for beginners—it’s for every team that wants to improve, adapt, and deliver reliable, error-free installations consistently.
Creating a Smooth Workflow for Install Teams
The key to a successful flap barrier installation lies in the process. An efficient workflow helps teams minimize stress, reduce errors, and complete projects faster without sacrificing quality. It also ensures that everyone knows their responsibilities and that no critical steps get overlooked.
A smooth workflow begins with team coordination. Before the job starts, everyone on-site should know the plan, the timeline, and their individual roles. There should be clear communication channels between electricians, installers, programmers, and project managers.
Next comes structured execution. This means following a phased setup: first, site prep and marking; then, physical installation and alignment; followed by wiring and calibration; and finally, testing and reporting. Each phase should be signed off before moving to the next to avoid the domino effect of overlapping tasks.
Documentation also plays a major role. Teams should keep daily logs, take progress photos, and track deviations from the plan. This allows for quick issue resolution and supports future maintenance if needed.
Training is another critical element. Installers should be regularly updated on new models, tools, and techniques. Investing in training not only improves efficiency but also boosts morale. Skilled, confident technicians work faster and make fewer mistakes.
When you design your workflow around clarity, structure, and flexibility, everything gets easier. You reduce risk, increase accountability, and deliver projects that meet or exceed client expectations.
Conclusion – Getting It Right the First Time
Flap barrier installations can either be seamless projects or costly headaches—it all comes down to how you approach them. The difference between success and failure isn’t always in the tools you use but in the attention to detail, the commitment to safety, and the willingness to follow proven processes.
By understanding the most common flap barrier installation errors and knowing how to prevent them, you give yourself an edge. You reduce downtime, avoid client complaints, and install systems that work perfectly from day one. This isn’t just about avoiding mistakes. It’s about building a reputation for excellence.
As security needs grow and access control systems become more sophisticated, the demand for professional, error-free installations will only rise. By applying the insights from this guide—and committing to continuous improvement—you ensure your place at the top of that demand curve.
So take these lessons to heart. Prepare thoroughly. Align carefully. Wire smartly. Calibrate precisely. Test completely. And most of all—install with purpose and pride.
FAQs
Q1: What’s the most common flap barrier installation error?
The most frequent error is poor site preparation. An uneven or unstable base leads to alignment issues, flap jamming, and eventual mechanical failure.
Q2: Can flap gates be installed without calibration?
No. Skipping calibration results in slow or unresponsive flap movement and sensor misfires. It also increases motor strain and maintenance costs.
Q3: How long does a proper flap barrier installation take?
Depending on the environment and number of units, a proper installation—including prep, wiring, alignment, and testing—can take 1 to 3 days.
Q4: Are safety standards mandatory for all barrier types?
Yes. Ignoring safety standards can result in injury, legal issues, and failure to pass inspections. Safety should be built into every stage of installation.
Q5: Where can I find a full installation guide for flap barriers?
You can find a complete guide here, covering step-by-step instructions for safe, accurate installations.