What Affects Flap Barrier Installation Cost? A Practical Look

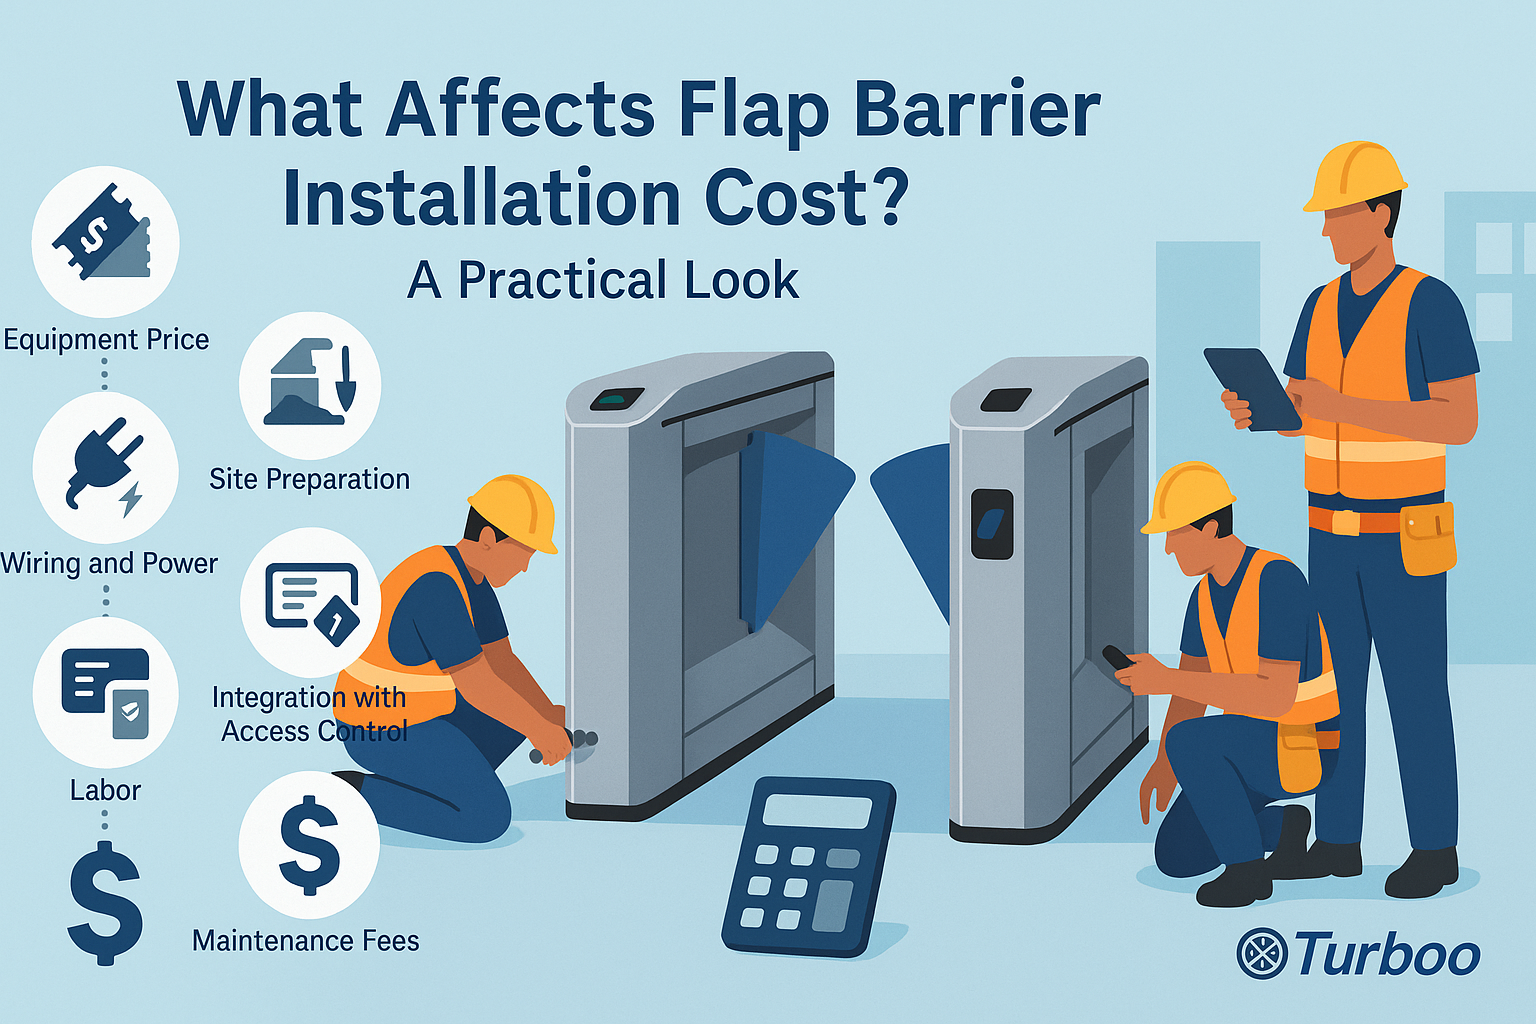
Many buyers are caught off guard by the final bill for installing a flap barrier. It’s not just the unit price that matters—it’s the full cost of setting up that system in your space. At first glance, installation might seem like a simple task. But once site conditions, electrical needs, and system integration come into play, those “small extras” can push the price up fast.
This is why flap barrier setup cost is a critical line item to understand before signing a purchase order. What seems like a straightforward job can reveal all kinds of complications, from buried wiring paths to outdated building layouts. Inexperienced buyers may only budget for equipment, not for the labor, civil works, or software work needed to make that equipment function.
Installation expenses vary not just by vendor but also by location, scope, and setup details. A school in a suburban area might pay less than a corporate office downtown—simply because of labor rates or building access.
This article is here to break down all the real-world costs that affect barrier setup pricing. Whether you’re planning one unit or twenty, these insights will help you create a more accurate budget, ask better questions, and avoid last-minute charges.
Labor Costs and Regional Price Differences
Labor is usually the biggest piece of any flap barrier setup cost. Rates for skilled technicians vary widely based on region, certification, and demand. In large cities, where wages are higher and qualified installers are in short supply, prices can be 30–50% more than in smaller towns or rural areas.
It also depends on how long the installation takes. A basic setup in a well-prepped site might need only a day or two. But more complex installs could take several days, requiring multiple technicians, electricians, and IT professionals. That multiplies the labor cost quickly.
Another variable is the level of expertise required. If your site uses integrated biometric readers or cloud-based access systems, the team installing it needs specialized training. These skilled workers command higher hourly rates. In some countries or states, union labor is required for public building projects, which comes with fixed rates and scope limits.
Also, if your installation takes place during night hours, weekends, or holidays—common in offices that can’t afford daytime disruption—expect labor rates to increase accordingly.
Understanding local labor dynamics early in the project helps reduce sticker shock and build more accurate installation budgets.
Site Preparation Requirements
Before a flap barrier can be installed, the space has to be ready. This includes everything from having a level floor to clearing physical obstructions like furniture, fixtures, or uneven surfaces. These site conditions often seem minor—but fixing them can cost hundreds or even thousands of dollars.
For example, a typical indoor barrier setup may need a clean, flat, and unobstructed surface. If your floor isn’t level, concrete grinding or slab work might be required. Some barriers need bolt-down plates that require surface cutting or drilling. Others use embedded boxes, which means opening up the floor.
Outdoor sites may need more prep. If the location lacks adequate drainage or power access, your installer may have to pour concrete pads or run trench lines. In older buildings, barriers might need extra reinforcement if the surrounding structure can’t support their weight.
Site prep is also where unexpected discoveries happen. You might uncover buried pipes, electrical lines, or old infrastructure that adds delay and cost. That’s why most suppliers recommend a site visit and layout review before quoting.
Learn more about prep essentials here: Flap Barrier Site Prep
The earlier you evaluate and prepare the space, the less you’ll pay in change orders later.
Wiring Complexity and Power Access
Every flap barrier needs power—and many need a network connection too. The complexity of that wiring setup plays a big role in final installation cost. If your site already has nearby outlets, junction boxes, or network switches, you’re ahead of the game. But if not, wiring can become one of the most expensive parts of the process.
Barriers typically require a dedicated power source with proper grounding. If you need to run a line from a distant panel, an electrician may have to open walls, install conduit, and coordinate with building management. That can add days of work and high labor charges.
For networked systems, ethernet cables need to reach each barrier. In open-plan areas, this might involve raised flooring or overhead trays. In older buildings with solid walls, it could mean core drilling or trenching. These infrastructure changes add significantly to setup pricing.
Some advanced barriers use PoE (power over ethernet) to simplify cabling, but only if your building supports it. Even then, IT coordination and port allocation take time.
To understand wiring needs in more detail, see: Flap Barrier Wiring Guide
Don’t assume wiring is “just included”—ask your vendor for a detailed cabling plan before installation starts.
Civil Works and Environmental Adjustments
Civil works refer to any structural or physical changes made to the building during flap barrier installation. These are often necessary but rarely included in standard quotes. They cover a range of tasks like removing tiles, rerouting walkways, or modifying walls and ceilings.
If your space has floor tiles that don’t support heavy drilling, they may crack or lift during install. Replacing them adds material and labor costs. If your site has raised floors or access ramps, you might need custom mounting plates or filler structures to make the barrier stable.
In outdoor settings, you might need to pour concrete or build shelters to protect the units from rain, dust, or vandalism. That can require permits or coordination with local contractors.
Drainage is another environmental factor. In outdoor or semi-covered areas, poor drainage can damage electronics over time. That means you may need slope adjustments or water diversion to ensure longevity.
All of these add up quickly. Civil works are also where unexpected budget surprises tend to happen—especially if they weren’t accounted for in early planning.
Software and Access System Integration
Software setup can be a major contributor to flap barrier setup cost. While the physical installation might seem complete once the unit is in place, your system is not ready to operate until the software is configured and tested. And that process often reveals hidden complexity.
Most flap barriers today connect to access control platforms. These could be badge readers, fingerprint sensors, mobile phone apps, or cloud-based security systems. To integrate the barrier with your specific system, software specialists need to ensure compatibility, map out user permissions, and test real-time behavior.
This work takes time and usually isn’t included in hardware-only quotes. In fact, some vendors charge separately for access control programming or require you to work with your own IT team to complete the setup. That creates room for miscommunication and delays if expectations aren’t clear upfront.
The complexity increases if your system uses advanced features like time-zone access rules, multi-door coordination, or cloud-based logging. These require firmware updates, custom configurations, and network testing—all tasks that demand experienced technicians and extra man-hours.
When installation involves both IT teams and physical installers, scheduling becomes important too. If one group is delayed, the entire setup timeline can shift, adding unexpected labor costs.
To manage these software-related costs, confirm early whether your vendor includes integration services or if you’ll need to budget separately for them. And make sure your internal IT staff is available and informed during install day.
Delivery and Handling Costs
Getting your flap barrier from the warehouse to your site may seem simple—but it can be more expensive than expected, especially if logistics weren’t planned thoroughly. Delivery costs depend on the size of the order, distance from the supplier, and the type of access available at the delivery location.
In many cases, large barriers arrive in wooden crates or reinforced packaging. These materials protect the product but add weight and volume. That means more expensive freight, special handling, or even permit requirements for oversize loads. In remote areas, some vendors charge an additional distance or fuel fee. Urban deliveries may include elevator access, lift gate needs, or narrow building entry planning.
Once the unit arrives, unboxing is another task. If you’re handling installation yourself, make sure you have space and manpower to unpack the barrier safely. Some models weigh over 100 kilograms and can’t be moved without lifting equipment.
Staging is also important. If the barrier must be moved from a loading dock to an upper floor, that may require building staff, elevator bookings, or even temporary ramps. None of these costs appear on the initial invoice, but they directly impact installation pricing.
When comparing quotes, always ask if delivery, uncrating, and handling are included—or if they’re billed separately.
Vendor Planning and Communication
One of the most underrated ways to control barrier setup pricing is strong communication between buyer and vendor. Misunderstandings lead to delays, and delays increase costs. That’s why every professional installation should begin with a planning phase, not just a quote.
This planning includes a site survey, where the vendor or installer checks measurements, power availability, and walking flow. These checks prevent errors like incorrect barrier sizes, missing cables, or entry points that don’t meet safety regulations.
Good vendors also provide wiring diagrams, base mounting specs, and software installation guides ahead of time. These documents allow your facilities team to prepare the site before the equipment arrives—cutting down on wasted time.
Another value of good planning is avoiding change orders. If a client decides to reposition the barrier after it’s installed, or adds new features during the project, those changes cost extra. But with early communication, many of these needs can be discussed, quoted, and planned for.
The most successful installations happen when all stakeholders—IT, security, building maintenance, and the vendor—meet beforehand to align expectations. This might seem like extra work, but it leads to smoother projects and lower final invoices.
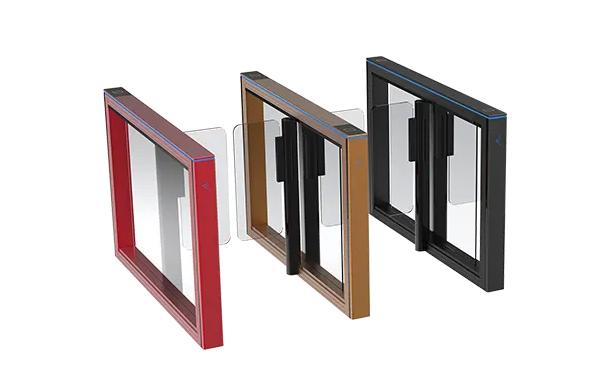
Flap Barrier Model Choice and Setup Needs
Not all flap barriers are created equal when it comes to installation requirements. Some are designed for fast installs, while others require more customization and preparation. Your choice of model has a direct impact on setup time and cost.
For example, compact models meant for indoor lobbies may come pre-wired and need only surface anchoring and minimal electrical work. These barriers are quick to deploy and don’t require floor modifications or integration hardware. As a result, their installation fees are lower.
In contrast, high-end or industrial models often include more features. These might include multiple access points, facial recognition units, LED lighting, and anti-tailgating sensors. While impressive, these features increase wiring needs, setup time, and software integration work.
Some barriers also require a specific foundation structure. That means floor cutting, conduit installation, or drainage planning. Others may include modular add-ons, which require sequencing the install over several days.
Another factor is warranty terms. Some vendors only honor full warranty coverage if the barrier is installed by certified technicians. That means you must choose between a higher-cost professional install or risking limited support if you opt for DIY or in-house setups.
Choose your model wisely—not just for its features, but for how much it will cost to make those features work in your space.
Hidden Costs That Add Up Fast
Even well-planned installations can run into surprises. These unexpected issues may seem small on their own, but together they drive up the total flap barrier setup cost. If you’re not prepared for them, they can derail your budget quickly.
One common example is rescheduling. If the site isn’t ready when the team arrives, the project gets pushed back. That can mean cancellation fees, return visits, or storage charges for the equipment while the site gets prepped.
Another hidden cost is extra materials. Installers may discover that more cable is needed than estimated. Or that the mounting surface requires special anchors. These needs often emerge mid-install and come with rush charges or markup fees.
Software surprises are another trap. If a required module wasn’t licensed or a server isn’t ready, IT integration can stall—forcing a second visit and more labor billing.
There are also logistical snags like damaged goods during transit, miscommunication on delivery dates, or access delays caused by building security. Each hiccup adds time, and time equals money.
The more detail you confirm ahead of time—from wiring maps to site drawings—the fewer hidden costs you’ll face later.
How Good Planning Reduces Installation Expenses
Planning is the single most effective way to keep flap barrier setup cost under control. Every stage of the installation process becomes smoother when there’s a clear plan—and that translates directly to lower costs.
Start with a detailed site review. Identify where the barriers will go, what electrical access exists, and how foot traffic should move. Even something as simple as confirming wall clearance can prevent expensive repositioning later. Use this chance to check floor condition, ceiling height (for sensor or camera units), and internet access for cloud-based systems.
Next, meet with the vendor or installer. Request a written scope of work that includes materials, labor, timeline, and responsibilities. Make sure software integration is part of that plan—or clearly noted if it’s not. This avoids confusion over who is setting up user databases or managing software updates.
Having all this in writing also reduces change orders. When everyone knows what’s expected, last-minute surprises are less likely. And if something does come up, it’s easier to see whether it falls within the original agreement or requires a separate approval.
Planning also means thinking about contingencies. If your site will be in use during the install, coordinate with building operations to minimize disruption. Reserve elevators, book staging areas, and let staff know what to expect. These small steps help keep the job moving—and avoid schedule extensions that cost more.
When projects are well planned, buyers spend less, work gets done faster, and everyone leaves satisfied.
Comparing Projects: Small Office vs. Public Transit Hub
Flap barrier setup cost changes dramatically depending on the scale and location of the installation. Let’s compare two common types of projects—a small office and a busy transit station.
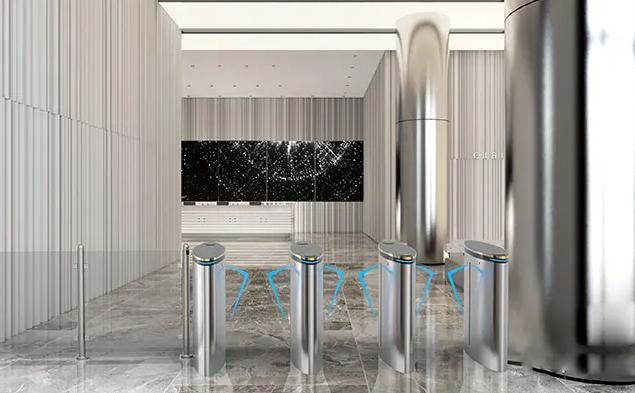
In a small office, the setup is often simpler. One or two barriers are placed at a single entrance. The site likely has nearby power, a controlled environment, and minimal structural work. Installation might take a day or two with basic labor. If integration is limited to a badge reader, software setup is fast. Total costs stay low.
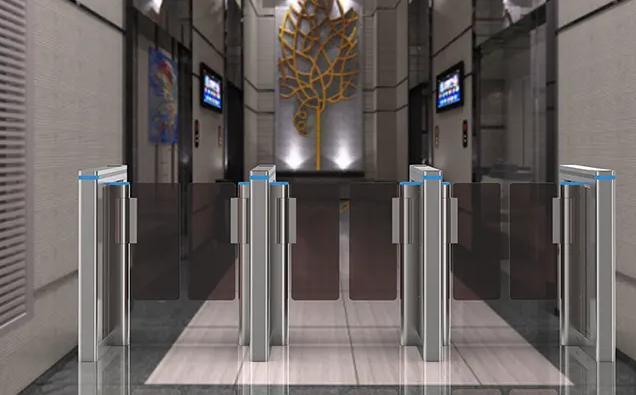
Now consider a public transit hub. These sites handle high foot traffic, need rapid throughput, and often operate 24/7. Barriers must be fast, durable, and fully integrated with central systems. The space may require civil works like floor trenching or drainage adjustments. Installation teams need off-hours access to avoid disrupting passengers.
Transit hubs also need backup systems, emergency access controls, and advanced software for data logging. This requires coordination between electrical teams, software integrators, and transport authorities. Even before installation begins, there might be weeks of planning and site testing.
The contrast shows how location, volume, and technical requirements affect total installation expenses. What works in one setting may fall short—or cost far more—in another.
Insights from Installation Professionals
The people who install flap barriers every day know where projects go right—and where they go wrong. Their insights can help you avoid common traps and control costs from day one.
One tip is to avoid vague quotes. If your vendor gives a flat number without breaking down labor, software, or site work, ask for more detail. Installers often see buyers under-budget because they didn’t realize software or wiring weren’t included.
Another common mistake? Forgetting about IT coordination. Barriers need data to work, and if your network team isn’t looped in early, expect delays. Techs recommend assigning a single point of contact on your end to work with the vendor and manage timelines.
Installers also point out that many problems come from misaligned expectations. For instance, a customer might expect same-day setup, but the floor isn’t ready or access badges haven’t been issued. These delays cost money—even if no one is working, you’re still paying for time lost.
The final piece of advice? Be present. Clients who are available to answer questions and make decisions in real time keep projects moving and avoid unnecessary back-and-forth.
Installers know: clear plans and fast feedback save hours—which saves money.
When to Choose Vendor Installation Services
Some buyers try to cut costs by handling installation in-house or hiring third-party electricians. While this can work in simple settings, there are times when vendor-provided installation services are the smarter investment.
The biggest benefit of going with the vendor is accountability. If something breaks or doesn’t work, the same company that installed it is responsible for fixing it. You don’t have to figure out whether the hardware, software, or wiring is to blame—they handle it all.
Vendor teams are also more familiar with the product. They know exactly how to calibrate sensors, adjust gate timing, or sync with specific access control platforms. This speeds up the process and reduces setup mistakes.
Another plus? Warranties. Many manufacturers require professional installation for full warranty coverage. If your team damages something during a DIY install, it may void the guarantee.
That said, in-house teams may work well for low-tech barriers in simple environments. Just make sure they understand the electrical, software, and safety requirements ahead of time—and that you’re okay taking responsibility if something doesn’t work as expected.
When time, security, and system complexity are high, vendor installation often pays off in long-term savings and peace of mind.
Checklist: Key Factors Influencing Flap Barrier Setup Cost
- Local labor rates and technician availability
- Site prep needs like leveling, trenching, or floor cutting
- Electrical wiring and network cabling length or access
- Civil works including drainage, concrete pads, or wall adjustments
- Software integration with badge readers, biometrics, or mobile apps
- Delivery logistics, including heavy load handling or remote surcharges
- Clarity of vendor scope, drawings, and communication
- Barrier model complexity and accessory setup needs
- Hidden extras like rescheduling, extra parts, or delay charges
- Warranty or support terms tied to certified installation
Final Thoughts
Flap barrier setup cost is more than just plugging in a unit. It’s a mix of planning, prep, labor, and system coordination. The better you understand what’s involved, the easier it is to avoid surprises and stay within budget.
By thinking ahead, choosing the right model, and coordinating closely with your vendor, you’ll reduce risk and save money. And most importantly, you’ll get a system that works smoothly from day one—without costly backtracking or missed deadlines.
Whether you’re managing one entry point or rolling out a larger system, use the insights in this guide to make smart, informed decisions that support your goals and protect your budget.
FAQs
1. Why do flap barrier installation costs vary so much between sites?
Every site has different needs—like wiring distance, labor rates, or building layout—which affect total cost.
2. Is software integration usually included in the installation quote?
Not always. Some vendors charge separately for software setup, so be sure to confirm this in writing.
3. Can I install a flap barrier without professional help?
It’s possible for basic models, but advanced systems with access control or safety sensors usually need expert setup.
4. What’s the most common hidden cost during barrier setup?
Site delays or missed wiring requirements are the most frequent surprises—and they can be costly.
5. How can I avoid surprise charges during installation?
Do a full site review, get a detailed scope of work, and confirm every service in advance with your vendor.