Step-by-Step Guide to Installing Flap Barriers Without Errors

Installing a flap barrier may seem simple at first. But one small mistake during setup can cause major problems later. Poor alignment leads to stuck arms. Wrong wiring causes delays or system failure. Software that isn’t configured correctly might reject valid users. These issues slow projects, raise costs, and frustrate everyone involved.
That’s why every flap barrier installation must follow a clear process. Many common errors can be avoided with better planning and a step-by-step approach. Whether you’re a facility manager, technician, or project planner, this guide helps you install flap barriers right the first time.
It’s not just about plugging in the device. Good installation includes proper site prep, correct wiring, solid mounting, and full system testing. Each step matters. Skipping one often leads to extra labor, lost time, or damaged parts.
This guide breaks it all down in simple language. No jargon. No shortcuts. Just a clear method that gets results. If you want a smooth flap barrier setup without the usual headaches, this is your roadmap. Follow it closely, and you’ll save both time and money.
Stage One – Preparing the Site Properly
Every successful flap barrier installation starts with good site preparation. This stage sets the foundation for the entire setup. If skipped or rushed, it leads to misaligned barriers, exposed wires, and electrical safety risks.
First, the floor where the barrier will sit must be clean and level. Even slight tilts or gaps can throw off the alignment of the arms. That can cause the barrier to jam or open unevenly. Use a level to check the surface. If needed, grind or patch the floor to create a flat base.
Next, take exact measurements. Your flap barrier needs enough space to open fully. If the unit is installed too close to walls, doors, or furniture, it might not operate safely. Always measure twice before placing the base.
Now check for power and data lines. Where are your electrical outlets? How far is the nearest network port? If these are too far, you’ll need to plan cable paths in advance. Longer distances often require conduit or trenching, which adds time and cost.
Coordination with building management is also key. You may need approval for drilling or cutting into floors or walls. In high-security or commercial buildings, access permissions are usually required.
For a deeper look at this stage, review this helpful guide: Flap Barrier Site Prep
Good site prep avoids expensive adjustments later. Don’t skip it.
Stage Two – Handling Electrical and Network Wiring
Wiring is one of the most sensitive parts of flap barrier setup. If done wrong, it leads to power problems, software issues, or complete system failure. Done right, it gives your barrier the stable foundation it needs to function every day.
First, make sure power is safely routed to the unit. Check the voltage and current requirements listed in the manual. Most flap barriers need a dedicated power line with proper grounding. Avoid using extension cords or temporary power. These are unsafe and unreliable.
If the installation requires digging or conduit work, use protective tubing to shield the wires. This prevents damage from foot traffic or cleaning machines. All connections should be sealed and tested before the unit is turned on.
Network wiring is just as important. Flap barriers that use access control software need reliable data connections. That might mean ethernet cables for direct LAN connection or fiber if long distances are involved. Make sure your switch ports are active and the firewall rules allow traffic between devices.
Keep power and network lines separate to avoid signal interference. Use color-coded cables to reduce mistakes during connection. Label both ends of each wire so future maintenance is easier.
For details on how to wire a system properly, read the Wiring Guide
Also, always follow safety codes when running electricity in commercial spaces. Learn more at NFPA Electrical Safety
Stage Three – Mounting the Flap Barrier Securely
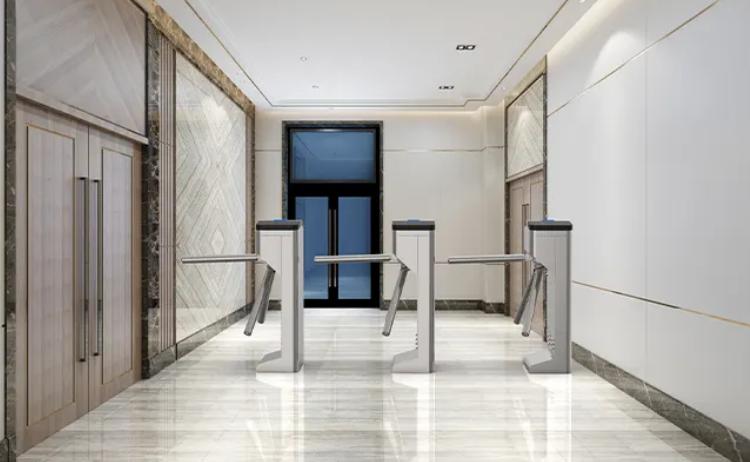
Now that the site is prepped and wires are in place, it’s time to mount the flap barrier. This step is about physical accuracy and alignment. A sloppy installation here will affect how well the unit operates for years to come.
First, position the barrier so it aligns with the natural walking path. Misaligned barriers confuse users and can cause foot traffic problems. Make sure the arms open in the right direction and don’t hit walls or objects nearby.
Use the template provided by the manufacturer to mark mounting holes. Drill carefully—if holes are too wide or misaligned, the anchor bolts won’t hold securely. Once the frame is bolted in, test the base by applying pressure. It should not rock, shift, or wiggle.
Next, adjust the height and level of the barrier. Uneven placement can cause arm movement problems or sensor errors. A laser level can help here. Check spacing around the barrier as well. Users need enough room to approach and pass through comfortably.
Also verify that all electrical and network cables feed into the barrier cleanly. Avoid pinching or stretching wires during the bolt-down process. Tidy cabling not only looks better—it prevents future service issues.
Once mounting is complete, do a physical walk-through. Approach the barrier as a user would. Check for obstructions, sharp edges, or loose components. Only when everything looks and feels solid should you proceed to power-up.
Stage Four – Testing the System Functionality
Once the flap barrier is securely mounted and all wiring is in place, the system needs to be tested thoroughly. This step confirms that everything works as expected before the barrier is opened to regular use.
Start by powering on the system. Check that the lights, control panels, and arms respond. If nothing turns on, revisit your wiring connections. Sometimes a loose cable or missed power switch can stop everything.
Once the system boots, test the movement of the arms. They should open smoothly, without jerking or delay. Most barriers run through a self-check when powered up. Watch this process carefully. Listen for grinding noises or strange clicks that may indicate misalignment.
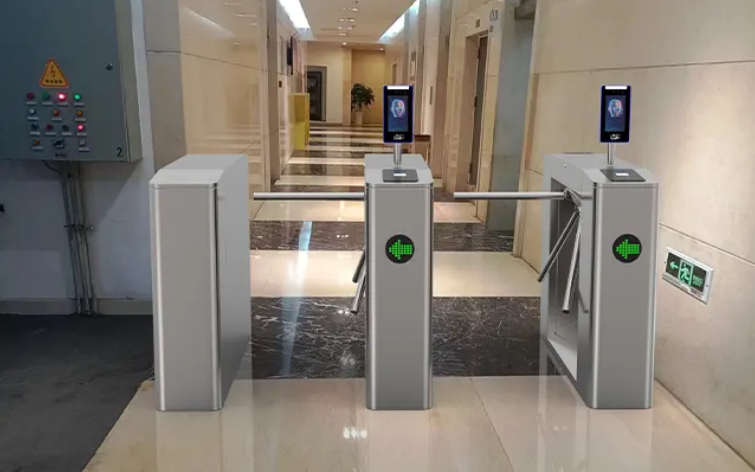
Next, test the access control response. Present a valid card, scan a fingerprint, or use whatever method your system is configured for. The barrier should respond instantly and allow entry. Then try an invalid entry—make sure the system blocks it. If it doesn’t, your access rules may not be configured correctly.
Make sure both entry and exit work if your system allows two-way movement. And check if alarms or warning lights activate when a person tries to enter without permission.
This is also the right time to sync the software. Link the barrier with the access control platform, server, or cloud system. Most modern barriers connect via IP. A software technician should verify device recognition, log events, and ensure the database is receiving the correct data.
Testing should be done multiple times in a row. Run several people through. Simulate busy conditions. The goal is to confirm not just basic function, but reliable performance under load.
Don’t rush this step. If a problem is going to appear, it’s best to catch it now—before real users face frustration or security breaches.
Stage Five – Troubleshooting Installation Issues
Even when everything looks right, problems can pop up during installation. That’s why knowing how to troubleshoot common issues is part of a good flap barrier setup.
One issue is card misreads. If users present their badge and nothing happens, the problem might be software-side. Check the reader connection and the access control settings. Make sure the card format matches what the system expects.
Sensor misalignment is another common issue. If the arms stop moving halfway or bounce back unexpectedly, the internal sensors may not be correctly positioned. This can happen if the frame is slightly tilted or the arms were moved during transport. Adjusting these sensors takes precision, so use the manual or call support if needed.
Power failures are also possible. If the unit turns off randomly, check your voltage supply. Undervoltage or unstable connections can interrupt operation. Use a multimeter to confirm steady current. Also check if too many devices share the same power line—this can overload circuits.
Software errors may appear as long loading times or ignored access events. Check your firewall settings, IP configuration, and time synchronization with the access control server. If your software license isn’t activated, some functions may not work.
Mechanical issues like squeaking arms or shaking cabinets are signs of loose mounting or lack of lubrication. These should be fixed before the barrier sees daily use.
If troubleshooting doesn’t solve the issue, reach out to the vendor. Most problems are minor when caught early—but ignoring them can lead to major repairs later.
Stage Six – Final Safety and Configuration Checks
Before the barrier is officially live, perform final safety and configuration checks. These are not optional. They ensure the system is ready for real-world use and that it complies with building safety regulations.
Start with the emergency release system. Most barriers have a manual override or automatic unlock during power failure or fire alarms. Test this feature by cutting power or triggering the emergency input. The barrier arms should open freely and allow safe exit.
Then review error logs. Most smart barriers store recent system messages. Check for repeated faults, sensor warnings, or failed authentication attempts. Address these before launch day.
Staff training is another key step. Whoever manages the system daily should know how to reset errors, respond to alarms, and troubleshoot basic issues. Walk them through common procedures. Leave printed instructions near the barrier or in a central system folder.
Finally, walk through the site with a checklist. Confirm all mounting bolts are tight. Check cables are hidden and safe. Test both entry and exit paths for clear movement. Try entering with various credentials—cards, mobile apps, or codes.
Make sure your setup also complies with electrical safety standards. You can reference guidelines at NFPA Electrical Safety Codes or IFSEC Access Control Guide for general best practices.
Installation Checklist: Steps to Avoid Errors
- Review the floor and entry space before installation begins
- Confirm access to power and network sources is ready
- Follow the flap barrier site prep steps for clean and level installation
- Use correct wiring procedures and shield cables properly
- Match voltage and network settings as per manufacturer specs
- Securely mount the barrier with proper anchors and alignment
- Power on and test barrier movement with real user credentials
- Integrate access control software and check for database sync
- Troubleshoot any motion, power, or reading issues before going live
- Verify emergency release, logging, and compliance functions
- Train staff on basic resets and alarm response
- Log and resolve all detected errors before handoff
By following this checklist, you greatly reduce the risk of delays, misconfigurations, or costly rework.
Final Thoughts
Installing a flap barrier doesn’t have to be complicated. But it does require careful steps and a clear understanding of what each stage involves. Rushing or skipping one part of the process almost always leads to errors. These mistakes often cost more to fix than it would have taken to do the job right the first time.
That’s why following a structured, step-by-step approach matters. From preparing the site to configuring software, each step plays a role in ensuring a smooth setup. This guide has shown how to install flap barriers correctly—avoiding common problems while saving time and money.
Whether you’re managing a single access point or outfitting an entire building, proper installation makes the difference between frustration and long-term success.
FAQs
1. What’s the most common mistake during flap barrier installation?
Skipping site preparation. Uneven floors or poor cable access often cause long-term issues.
2. Can I install a flap barrier without network access?
Some basic models may work standalone, but most systems need network integration for full access control.
3. How do I know if my wiring is safe?
Follow manufacturer specs and electrical codes. Use proper voltage, shield cables, and consult an electrician if unsure.
4. Should I test the barrier before integrating the software?
Yes. Basic movement and power tests should be done first, followed by access control and software syncing.
5. What happens if I install it wrong?
Improper installation can void the warranty, lead to frequent failures, and increase security risks.