How to Assess Flap Barrier Quality After Installation

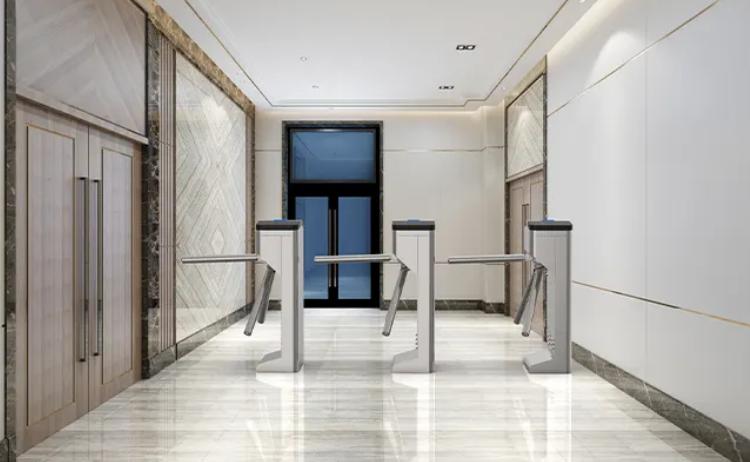
Installing a flap barrier is a milestone—but it’s not the finish line. Ensuring the barrier functions properly, meets quality standards, and aligns with your access control goals requires a structured post-installation assessment. Imagine catching a sensor misalignment before it causes access errors, or identifying a weak motor before it burns out under stress. That’s what flap barrier assessment is all about—preventing headaches before they start. This guide offers practical, step-by-step strategies for facility managers, security professionals, and maintenance crews to evaluate newly installed barriers for durability, functionality, and reliability.
Why Post-Install Flap Barrier Assessment Matters
Protecting Security Integrity
A poorly functioning flap barrier can be worse than having none at all. After installation, it’s critical to ensure the system doesn’t just look operational but actually performs at peak capacity. If a flap delays or misfires, it can allow unauthorized entry or deny access to valid users, compromising the entire security setup. Proper flap barrier assessment helps verify that the system operates as intended, catching flaws before they become security gaps.
Preventing Long-Term Costs
Think of your flap barrier as an investment. An early quality check is like a health screening—it might uncover small issues that, left unresolved, could lead to major repair bills. Imagine having to replace a motor six months in due to overlooked calibration errors. A thorough post-installation performance review ensures you’re not blindsided by early system degradation or warranty voidance due to neglect.
Verifying Installation Accuracy
Even with the best products, a flawed installation can lead to subpar performance. An installation crew might leave a sensor slightly tilted or a flap improperly aligned, resulting in subtle but significant issues. By conducting a structured quality check like this one, you validate the install job and hold vendors or contractors accountable before signing off on the project.
Key Quality Indicators to Monitor
Materials and Build Standards
First impressions matter—but what’s beneath the surface matters more. Start by checking the materials used in the flap barrier. Are the flaps made from high-strength acrylic or polycarbonate? Is the frame stainless steel or a less durable alloy? Are welds clean and polished, or do they look rushed and uneven?
Signs of high build quality include:
- Tight weld joints
- Even surface finish
- No rattling or loose panels when touched
- Anti-corrosion coatings for outdoor units
Manufacturers usually provide specs outlining materials used—compare those against what’s physically installed. Don’t be shy about confirming that what’s promised is what’s delivered.
Mechanical Stability and Smooth Operation
Next, manually test the flap movement. It should feel firm but smooth—no grinding, jerking, or excess resistance. Check the flap arm for bounce-back, which indicates weak dampening or incorrect torque settings.
Key mechanical checkpoints:
- Does the flap return to the same resting position every time?
- Is there lateral play or vibration during movement?
- Does it complete a full open/close cycle without stopping midway?
Touch the barrier while it’s operating. Excessive vibration or noise usually signals loose parts or motor issues that need calibration or tightening.
System Responsiveness and Timing
A high-quality barrier responds instantly to an authorized command. Anything less than seamless can frustrate users or disrupt flow in busy environments. During your flap barrier assessment:
- Swipe an access card and measure time to flap movement
- Trigger multiple users at once and check for lag
- Simulate an emergency stop and verify flap response
Systems with programmable delays should meet configured timing exactly. If delays or timeouts are inconsistent, the system may have signal-processing issues or require firmware tuning.
Step-by-Step Flap Barrier Performance Assessment
Visual Inspection and Alignment Check
One of the first and most critical steps in flap barrier assessment is a thorough visual inspection. This doesn’t require advanced tools—just a keen eye and attention to detail. Begin by inspecting the physical alignment of the flap arms. When the barrier is in its closed position, the arms should align perfectly without gaps or overlap. Misalignment, even if minor, can lead to operational errors or premature wear on the internal components.
Check the housing for any signs of physical strain, such as scratches near moving parts, misfitting panels, or bent mounting brackets. Flap arms should be equidistant from their guides, and the motion tracks must be free from obstruction. Also, look underneath the unit to ensure that the base is mounted securely and level. An uneven base can skew the flap movement, leading to unnecessary friction or misfires.
If your visual inspection reveals irregularities, make note of them in your quality check log and proceed to see if these issues affect functionality. This early review often identifies oversights during installation that can be corrected before causing performance problems.
Mechanical Movement Review
Mechanical performance lies at the heart of barrier reliability. During your flap barrier assessment, observe how the flaps move through their full range. Trigger the barrier using a valid access method—like a swipe card or fingerprint—and carefully watch each motion. A properly functioning barrier will open and close smoothly without hesitation, noise, or jerky movement.
Pay close attention to the following:
- How long it takes the flaps to respond after access is granted
- Whether the flaps open completely without pausing or slowing mid-motion
- If the flaps close firmly without bouncing or slamming
Flap barriers are typically configured for hundreds or even thousands of operations daily. Any friction or delay during movement may indicate underlying mechanical issues such as worn bearings, poor lubrication, or misaligned parts. Run the barrier through at least 10 cycles consecutively to simulate light usage and check for consistency in performance.
A good practice is to conduct a mechanical evaluation with both single-user and dual-user triggers, especially in dual-lane or bi-directional setups. This helps identify whether simultaneous or quick-successive access attempts cause delays or system confusion, which can affect the reliability of your access control solution.
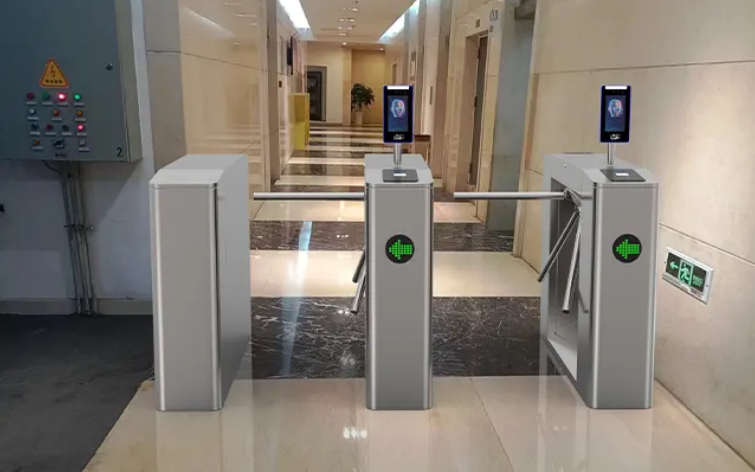
Electronic Functionality Test
Beyond physical movement, electronic components dictate how accurately and safely the system operates. An important part of flap barrier assessment involves checking the interaction between access control inputs and the barrier’s logic controller. Use a variety of valid and invalid credentials to see how the system responds.
A properly functioning barrier should:
- Open immediately when a valid card is presented
- Remain locked or give a clear alert when an invalid card is used
- Reset itself quickly for the next access cycle
Check also the LED indicators and status displays. They should change states appropriately—typically switching colors or blinking to indicate access granted, denied, or system standby. If your model includes a voice prompt or buzzer, verify its timing and volume.
System responsiveness is crucial during emergencies, too. Test the emergency release mode if your model includes one. This function should immediately retract the flaps and allow unimpeded passage when triggered, such as by a fire alarm or panic button.
Make note of any delays, misfires, or inconsistencies in signal response. You can cross-reference them with manufacturer parameters or perform a deeper evaluation using tools mentioned in the flap barrier tests documentation.
Conducting Post-Installation Tests
Stress Testing Under High Footfall
A truly effective flap barrier assessment must go beyond standard cycles and simulate peak operational loads. This is where stress testing comes into play. Organize a controlled test that mimics rush hour or high-traffic usage, allowing multiple users to pass through within a short period. The barrier must maintain responsiveness, accurate cycle timing, and consistent operation without overheating or failing to reset.
During this test, focus on:
- Detection rate consistency
- Motor behavior under rapid cycling
- Rejection of unauthorized or repeated entries
Observe whether the flaps overheat, make unusual noises, or begin to slow down. These symptoms indicate that the motor or control board may be under too much strain—either due to misconfiguration or insufficient hardware for the footfall volume.
Stress testing is particularly important in environments like transportation hubs or corporate campuses, where large numbers of people need swift and secure access. This test helps identify whether the installed unit is genuinely suitable for the volume and pace of the site’s traffic.
Power Failure and Recovery Simulation
Power continuity is vital for security infrastructure, but real-world conditions can’t always guarantee it. That’s why your flap barrier assessment should include a power loss and recovery test. Turn off the system from the main circuit or use a controlled switch to simulate a blackout.
Watch how the system behaves:
- Does it shut down safely without jamming or damaging the flaps?
- Is manual passage still possible in fail-safe units?
- Upon restoration of power, does the system reset correctly without manual intervention?
If the system includes battery backup or uninterruptible power supply (UPS), check that the flaps remain functional during the switch and monitor how long the backup power lasts. Log this duration for reference and compare it to the manufacturer’s claim.
These results are especially important in hospitals, airports, or schools, where power fluctuations may occur and access control must continue uninterrupted.
Access Control Signal Verification
Finally, test the integration between the flap barrier and your access control system. Each signal—whether from a card reader, keypad, biometric device, or remote controller—should be received and acted upon promptly. Perform repeated entries with each type of access method available in your setup.
If you experience delayed access, no response, or unexpected barrier behavior, the issue could lie in the signal transmission from the access device to the barrier controller. Investigate wiring, connectivity ports, and software configurations to ensure all components communicate effectively.
Your flap barrier assessment isn’t complete until all integrated systems work together in harmony. This is critical for enterprise-grade installations where centralized security monitoring depends on real-time access data.
Comparing Results to Manufacturer Specs
Operational Speed and Flap Cycle Accuracy
A key element of any flap barrier assessment is measuring whether the installed system performs to the specifications promised by the manufacturer. One of the most important metrics here is operational speed—the time it takes for the flaps to open and close completely after receiving a valid signal. Most commercial-grade flap barriers promise cycle times between 0.3 and 0.8 seconds. If your measured speed falls outside of this range, it could suggest mechanical resistance, underpowered motors, or software delays.
To check this, use a stopwatch or time-tracking app during multiple cycles and record your results. You should test different user scenarios, including single-entry, back-to-back entries, and invalid attempts. Discrepancies between actual performance and the published figures should be documented and investigated. Sometimes, incorrect configuration or installation can slow response times, and these should be addressed before they evolve into operational bottlenecks.
Sensor Sensitivity and Detection Range
Flap barriers rely on an array of infrared or ultrasonic sensors to detect motion, presence, and obstruction. These sensors are calibrated to a certain range—typically 20–50 cm depending on the model. A key part of your flap barrier assessment should be testing this range to ensure it matches manufacturer specifications. Use an object of average human height or simulate a pedestrian using a pole or standard cutout to move through the detection area.
Watch how early the system recognizes the object and triggers its programmed action—either opening the flaps or locking them if unauthorized. An overly sensitive sensor may result in false triggers, while a desensitized one may miss fast-moving individuals. You should also test for any blind spots—areas where the sensor fails to detect objects entirely. This can be dangerous, especially if the flaps attempt to close on a person.
If sensors are off-spec, recalibration may be possible via the onboard control panel or system software. Persistent misreads, however, could point to dirty lenses or defective components requiring replacement.
Noise Level and Motor Heat Metrics
Two often-overlooked indicators of barrier quality are noise and heat. High noise levels during operation may indicate mechanical strain, improper installation, or the use of substandard materials. Most high-quality flap barriers are designed to operate below 60 decibels—about as loud as a normal conversation. If your barrier emits grinding, clicking, or motor humming, it’s worth investigating the source.
Use a decibel meter to measure noise during normal operation and compare this to industry norms or manufacturer benchmarks. For heat, touch the motor housing after several continuous operations. It’s normal for it to feel warm, but if it’s hot to the touch, you might be dealing with an undersized motor, poor ventilation, or lubrication problems.
Monitoring these two metrics regularly helps identify early wear and ensures a quieter, safer, and longer-lasting installation.
Using Industry Standards for Reference
ISO and UL Quality Assessment Standards
International and regional standards help benchmark flap barrier performance against safety, quality, and operational consistency. When conducting a flap barrier assessment, you should refer to standards like ISO 9001, which outlines general quality management requirements, and UL (Underwriters Laboratories) safety certifications such as those listed at UL’s official page. These certifications confirm that a product meets rigorous testing protocols.
While the average facility manager isn’t expected to be an ISO auditor, understanding the basics of these standards can help assess whether your installed barrier meets accepted norms. Look for certification labels on the barrier’s body or documentation. Products that lack such credentials may not perform reliably or could fail local safety inspections, especially in regulated environments like airports or data centers.
If your barrier doesn’t carry recognized certification, consider requesting manufacturer documentation that details the specific testing or validation procedures applied during production.
Cross-Checking Against SecurityInfoWatch Guidelines
Industry portals like SecurityInfoWatch provide in-depth guides and articles covering access control systems, including post-installation checks. These resources often highlight best practices and include real-world issues experienced by other facilities, helping you benchmark your system’s performance.
Compare your test results and issues against the typical scenarios discussed on such platforms. If you notice recurring faults that align with documented flaws in similar models, you can better anticipate maintenance needs and even discuss performance upgrades with your vendor.
Compliance with ADA and Safety Regulations
Barrier systems should not only work well—they should also be safe and accessible. In many regions, flap barriers must comply with the Americans with Disabilities Act (ADA) or its international equivalents. This includes considerations like barrier width for wheelchair access, proper placement of sensors to avoid accidental flap closures, and low resistance for users with limited mobility.
Your flap barrier assessment should verify that all lanes marked for accessibility are at least 32 inches wide and allow delayed closing time for slower-moving users. Safety features like anti-pinch mechanisms, soft-close motors, and obstacle detection sensors are also mandatory in many jurisdictions.
Failing to comply not only affects user experience but can expose your organization to legal liabilities. Ensure your installation has passed local safety codes and request compliance reports if they weren’t included during the initial project handover.
Documentation and Reporting
Creating a Quality Check Log
After conducting your flap barrier assessment, all findings should be clearly recorded in a dedicated quality check log. This document serves as both a maintenance record and a proof of due diligence. Include entries for each component tested, the condition observed, and whether it met or deviated from expectations.
Use a structured format:
- Date and time of the assessment
- Inspector’s name and department
- Barrier location (if multiple units)
- Observations and test results
- Actions taken or recommended
Having this log allows for trend tracking over time and simplifies reporting during audits or warranty claims.
Noting Deviations and Potential Risks
While some findings will be within acceptable tolerances, others might reveal deviations that suggest future problems. For instance, a slightly delayed flap response might be fine today but could worsen with increased footfall. It’s important to categorize such deviations:
- Minor: Can be monitored, no immediate action required
- Moderate: Needs adjustment, part inspection, or recalibration
- Critical: Immediate repair or system halt needed
Documenting potential risks also supports proactive maintenance planning and budget allocation.
Recommendations for Maintenance or Fixes
Every flap barrier assessment should end with a clear list of recommendations. These may include adjusting sensor range, scheduling follow-up lubrication, requesting firmware updates, or replacing misaligned flaps. By stating these actions clearly in your final report, you create an actionable roadmap that can be followed by maintenance teams or external service providers.
In facilities where safety and uptime are critical, acting on these recommendations quickly ensures continuous, secure operation and extends the life of the barrier.
Deciding When to Make Adjustments
Minor Tweaks: Sensor Alignment and Calibration
After your flap barrier assessment, some adjustments will fall into the category of minor tweaks—simple fixes that can be done without professional assistance. Sensor alignment is a common one. If a sensor is slightly off, it may cause the flap to react too soon or too late, resulting in access errors or false triggers.
To address this, locate the sensor modules—usually placed on the top or inside of the flap housing—and use the adjustment screws or software interface to fine-tune detection range and angle. Follow manufacturer instructions closely, as over-adjustment may create new problems. Calibration of time delays is also important; the flap should open promptly upon a valid signal and close after a preset time that allows safe passage.
These small fixes can significantly improve performance and should be part of your routine post-install quality check protocol.
Moderate Corrections: Motor Response Lag
If your flap barrier exhibits slow or inconsistent motion, the issue may lie with the motor settings. Unlike mechanical wear, which requires part replacement, response lag often stems from incorrect torque configurations or firmware glitches. During your assessment, note how the motor behaves across multiple cycles.
If the lag is consistent and occurs at startup, it could indicate a programming delay. If it worsens after repeated use, overheating may be a factor. Most modern systems allow access to motor settings via the control interface. Use this to adjust torque levels, limit cycles, or reset to factory defaults.
While these are considered moderate corrections, they should only be attempted if your team is familiar with barrier system programming. Otherwise, defer to certified technicians to avoid causing more complex issues.
Major Faults: System Failures and Recalls
Unfortunately, not all assessment results end with easy fixes. Sometimes, your tests may reveal major faults—like total sensor failure, unresponsive motors, or persistent system crashes. These issues typically stem from faulty components, bad firmware, or even product design flaws. When such problems are identified, it’s critical to stop usage immediately to avoid safety risks.
At this stage, contact your vendor or installer. Provide them with your assessment documentation, including logs, error codes, and test results. In some cases, these issues may be covered under warranty. Others might qualify for manufacturer recalls—especially if similar faults have been reported across other installations.
Do not attempt to repair or bypass these issues in-house unless explicitly guided by the manufacturer. Large-scale system failures must be handled by certified professionals to ensure compliance with safety standards and maintain the warranty.
Engaging Expert Technicians
When DIY Evaluation Falls Short
While a flap barrier assessment can often be performed by trained in-house staff, some cases warrant professional involvement. If your team lacks the diagnostic tools to access internal system logs or if issues recur despite basic troubleshooting, it’s time to bring in a technician.
This is especially true when:
- Error codes don’t appear in the manual
- System behavior contradicts normal functions
- Hardware issues persist after adjustments
A certified technician will have access to proprietary tools, calibration instruments, and firmware update kits that are not available to end users.
What to Expect from Professional Reviews
When you schedule a professional assessment, expect a methodical process. The technician will usually start with a full mechanical and electronic inspection, followed by diagnostic testing via the control software. They may also test integration with your building’s access control and fire alarm systems.
Upon completion, a service report is generated detailing:
- Detected faults
- Actions performed (e.g., realignment, firmware updates)
- Components replaced or adjusted
- Recommendations for preventive measures
This report is essential for maintaining service records and ensuring warranty eligibility.
Getting Certified Support for Flap Barrier Assessment
Many barrier manufacturers maintain a list of certified service partners or offer in-house support packages. Always request technicians with manufacturer certification. They are trained to work specifically on your system and understand its architecture, firmware, and operational parameters.
Certified support also ensures compliance with warranty terms and avoids the risk of unapproved third-party interference. Some support contracts even include scheduled flap barrier assessments as part of an annual service plan—providing peace of mind and reducing emergency service needs.
Common Post-Install Mistakes to Avoid
Ignoring Performance Drift
One of the most common oversights is ignoring gradual decline in performance. A barrier that works “well enough” today might perform below acceptable levels in just a few weeks. By the time noticeable problems arise, internal wear or misconfiguration may have already taken root.
After installation, even if everything looks fine, schedule a follow-up quality check within 30–60 days. This helps identify performance drift early and reinforces consistent system evaluation habits.
Skipping Initial Stress Tests
It’s tempting to assume the system is ready for full operation once basic functionality is confirmed. However, real-world usage often differs from test environments. Skipping initial stress tests can result in undetected flaws emerging during peak usage—leading to public embarrassment or security vulnerabilities.
Stress testing post-installation ensures the barrier can handle volume and speed under realistic conditions. Never rely solely on a static inspection when dynamic testing reveals so much more.
Relying Solely on Visual Checks
While visual inspections are a great first step, they don’t paint the full picture. Electrical issues, software bugs, and sensor misalignments can’t be seen with the naked eye. Relying exclusively on surface-level reviews can leave major faults undetected.
Combine your flap barrier assessment with electronic testing, functional cycles, and software diagnostics to gain a complete understanding of system health.
Maintenance Planning After Quality Check
Scheduling Routine Inspections
Post-install assessments are only the beginning. For continuous performance, establish a regular inspection schedule. Depending on traffic volume, monthly or quarterly inspections should be enough. High-traffic environments may need weekly or even daily quick-check routines.
Create a calendar or digital reminder system that alerts maintenance staff ahead of each inspection date. Use past assessment results to determine which components require more frequent attention.
Aligning Maintenance with Manufacturer Guidelines
Every manufacturer provides specific maintenance guidelines—including lubrication intervals, flap replacement timelines, and software update schedules. Adhering strictly to these not only ensures optimal performance but also protects your warranty.
Incorporate these guidelines into your internal SOPs. Use checklists and documented proof of maintenance to keep your system audit-ready and fully compliant.
Ensuring Long-Term Barrier Health
Flap barriers represent a major investment in facility security and efficiency. Your job doesn’t end at installation—it evolves into a stewardship role. A consistent quality assessment and maintenance plan ensures that your barrier stays functional, safe, and efficient for years to come.
When issues arise, having historical logs, test results, and professional assessments will guide smarter decision-making and faster resolution.
Conclusion and Final Thoughts
Assessing flap barrier quality after installation is more than a routine check—it’s a safeguard for your access control system’s reliability, safety, and longevity. From mechanical alignment and sensor testing to stress simulations and documentation, each step reinforces your system’s integrity. By combining in-house inspections with professional oversight, facility managers can ensure that their investment performs at its best from day one and continues to deliver dependable service over the long term.
FAQs
1. What is the first step in a flap barrier assessment?
Begin with a visual inspection of flap alignment, housing, and sensor placement to catch obvious installation errors or component damage.
2. How do you know if the flap barrier is misaligned?
Signs include uneven flap closure, scraping noises, or the flaps not returning to their default position after use.
3. What tests should be done immediately after installation?
Run stress tests, power recovery simulations, and access control signal tests to ensure the system performs reliably under real-world conditions.
4. Can flap barriers be evaluated without special tools?
Yes, many checks can be done manually or with simple tools like a stopwatch and multimeter. Advanced diagnostics, however, may require vendor-specific software.
5. Why are post-install quality checks often overlooked?
Time pressure, assumption of vendor reliability, or lack of SOPs often cause these checks to be skipped—leading to missed early warnings and future system failures.